40th birthday- Glass experience class at Elodie Holmes Liquid Light Glass, Santa Fe, New Mexico
What’s a girl to do for her 40th birthday? Pack up and head to Santa Fe, New Mexico of course!
My husband and I are planning to celebrate my big 4-0 again in the fall with an international trip. (Shaping up to be Italy/Malta/Gozo- hooray!) In the meantime, I wanted to take a trip to Santa Fe and cash in some Hotels.com free nights to celebrate the big day! More to follow on where we stayed, ate and what all we did, but for now, I wanted to share the trip highlight…a glass paperweight experience class at Elodie Holmes Liquid Light Glass!!! That is an understatement…not only was the class a trip highlight, but my most favorite experience I’ve had in my 30+ years of visiting Santa Fe!!!
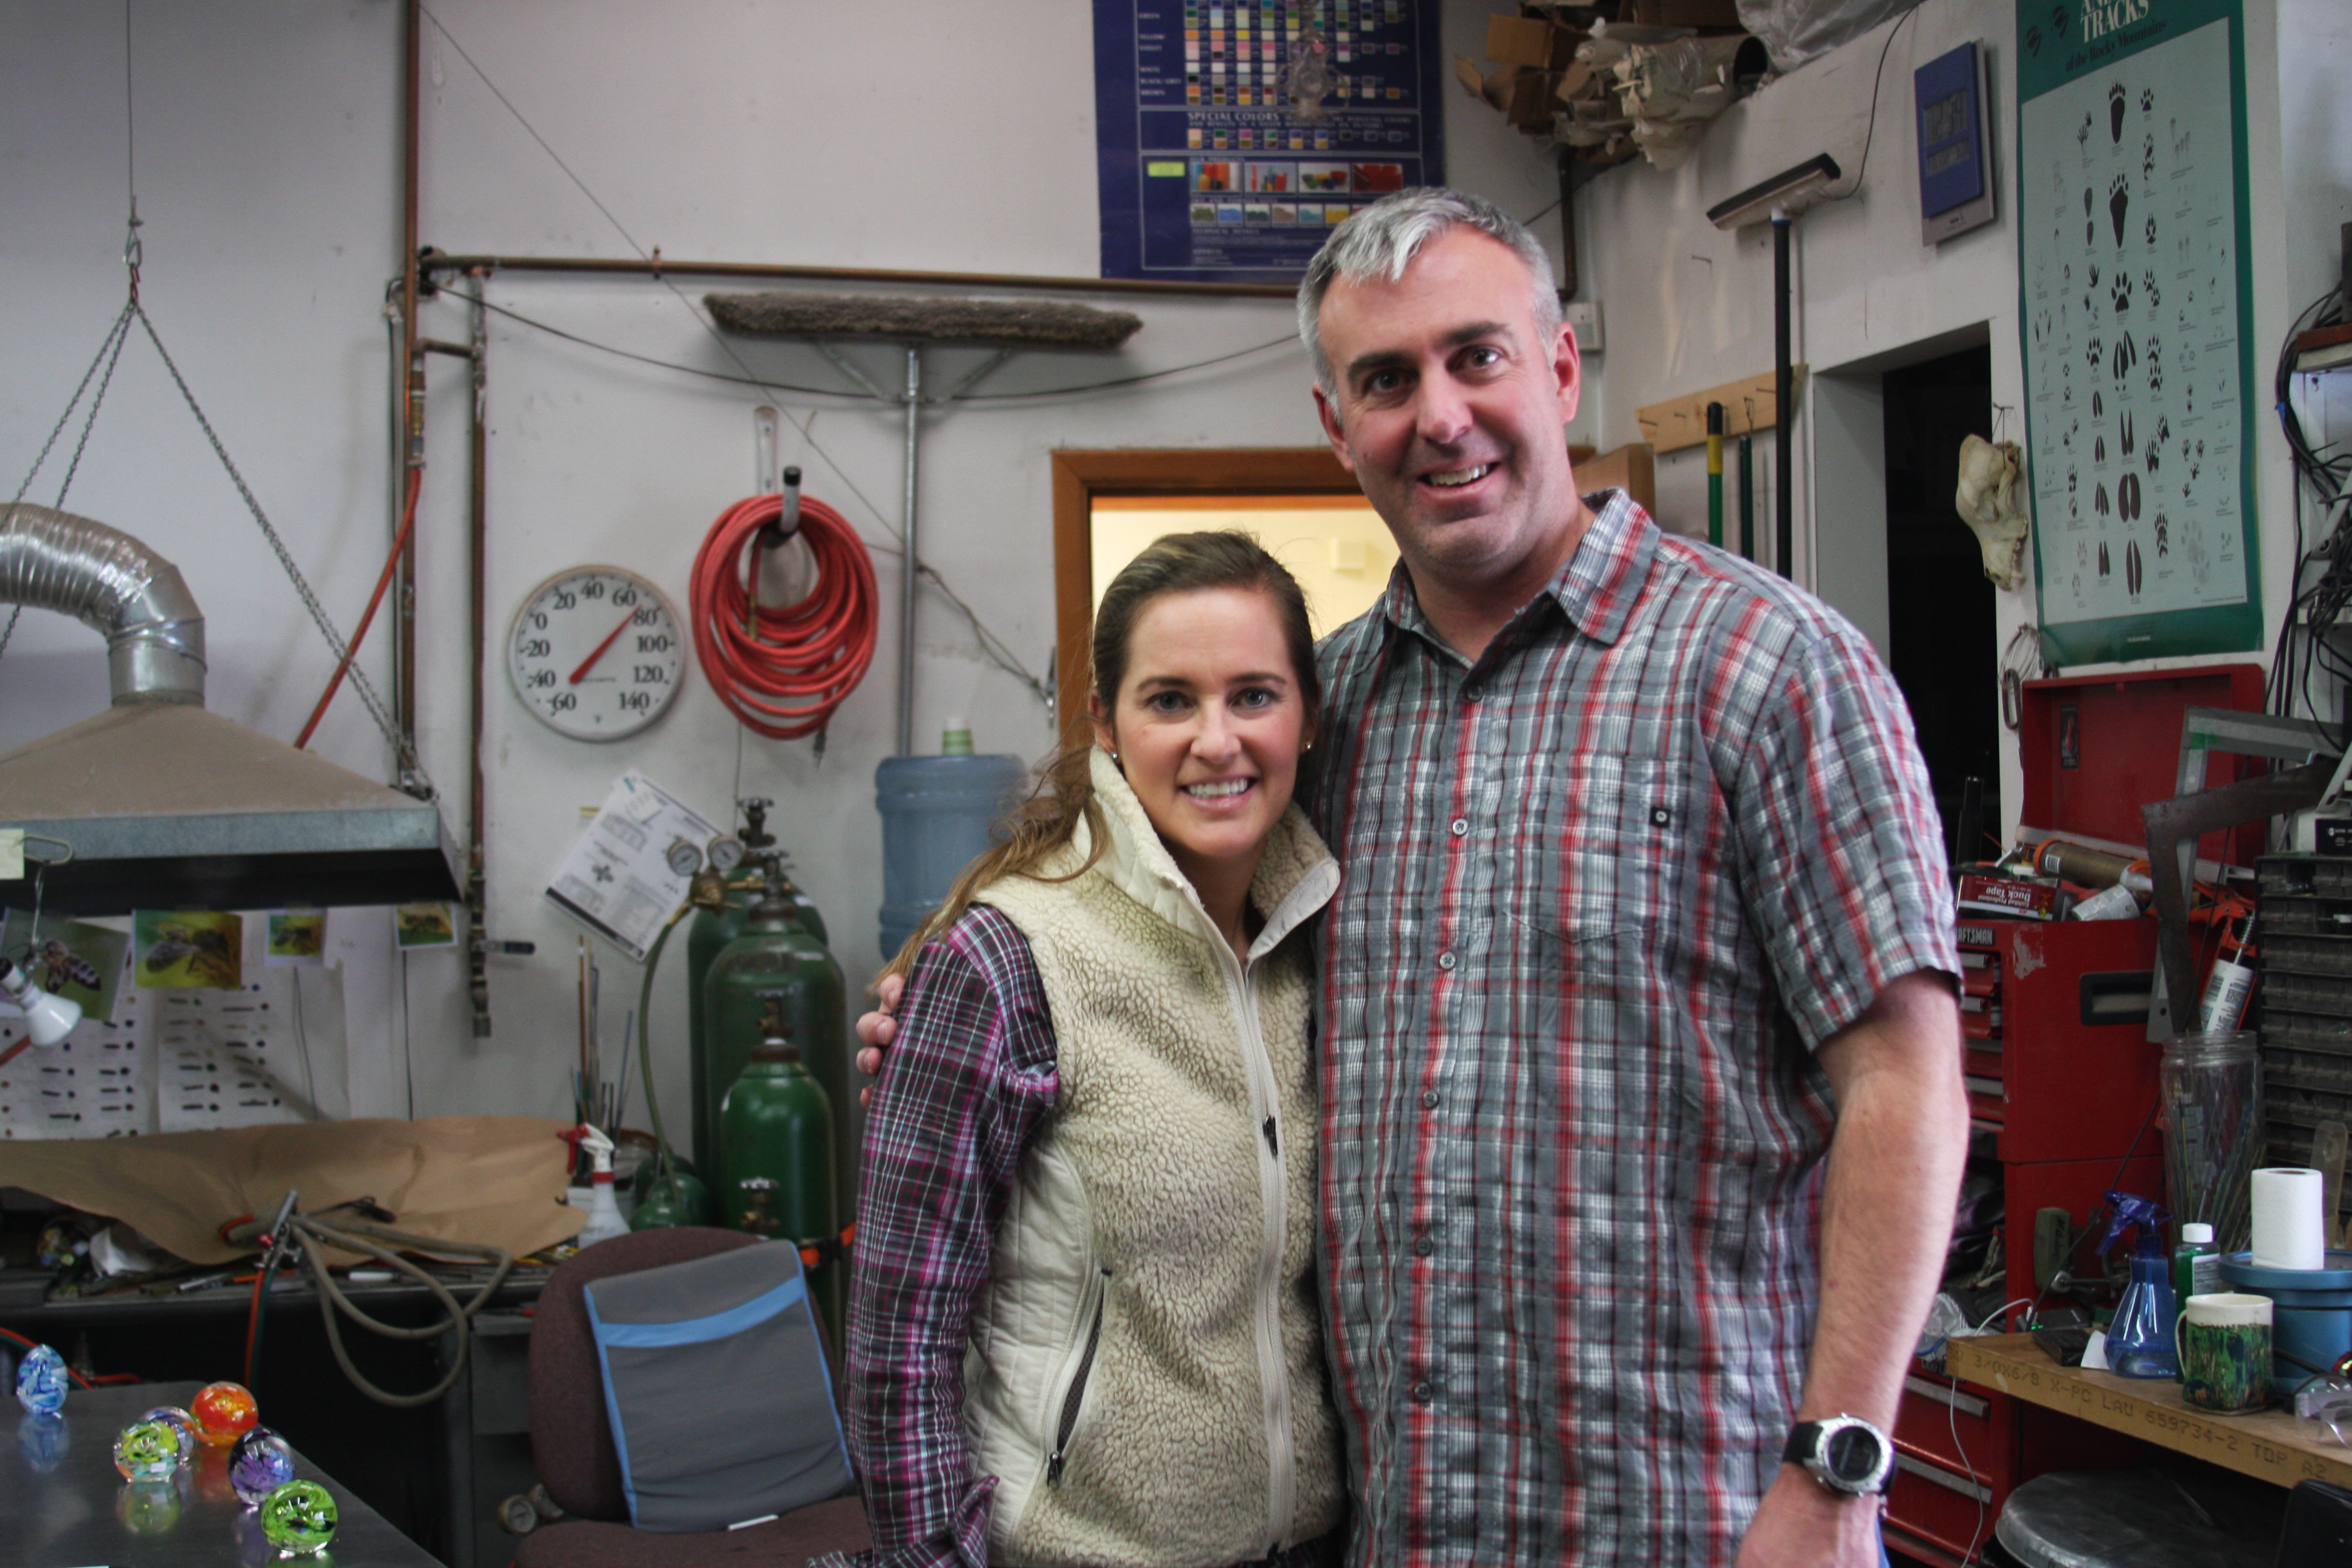
How did I decide I wanted to do this class you ask? Well, Santa Fe is a favorite destination of mine and after numerous trips there I decided to cast the net a bit wider and look for new, unique experiences. I ran across both Elodie’s website and Trip Advisor positive (actually 5 star) reviews, and was so excited to learn about the opportunity, get to create a piece of art and get my hands dirty. Interestingly enough my husband had just told me he wanted to buy a new paperweight, so eureka, there you have it. Perfect BIRTHDAY plans! I called on Thursday and while Elodie wasn’t in town to teach the normal Saturday class, another glass artist, Al Leedom, was teaching 3 other students and could fit us into his 10:00 class. Note: While the Trip Advisor reviews were amazing, I didn’t really have a clue about the crafting process, or what to expect so I thought I’d share my experiences with you! I am sure I am not getting all these steps beneath exactly right. I really just want you to get a good overall sense of how hands on you get to be, the time involved, and the creative process…I’ll leave it to the professionals all the other aspects.)
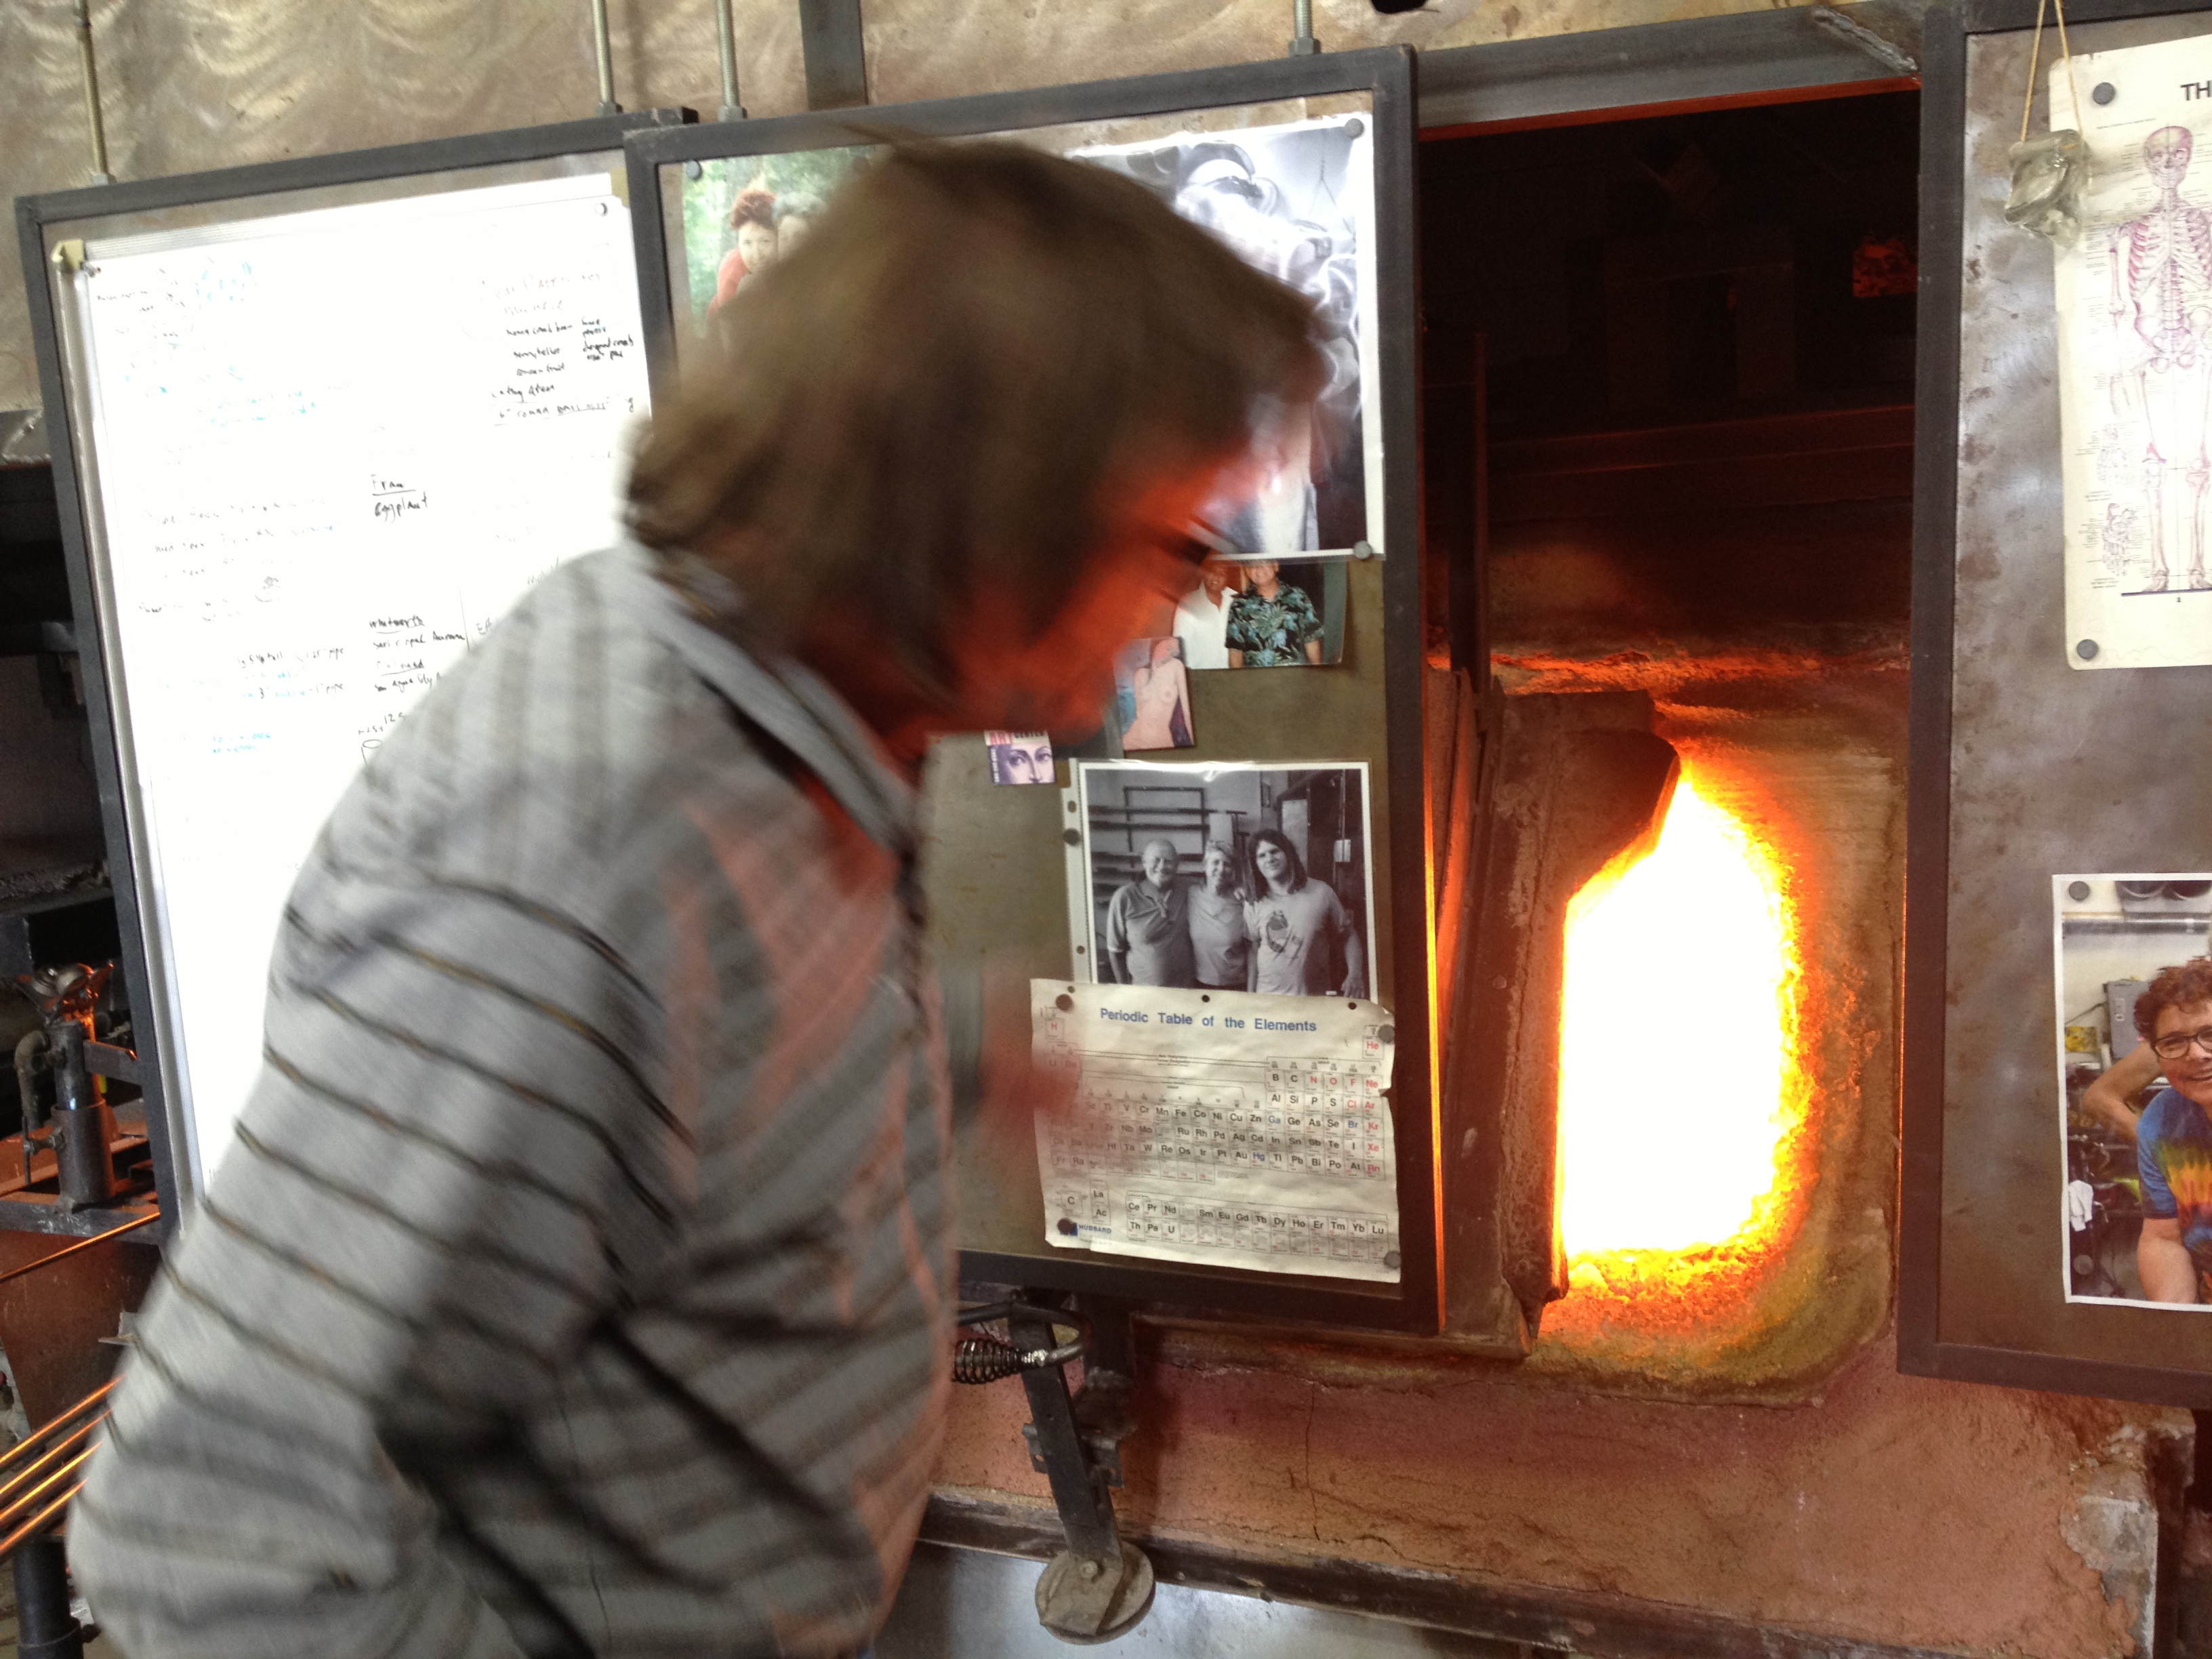
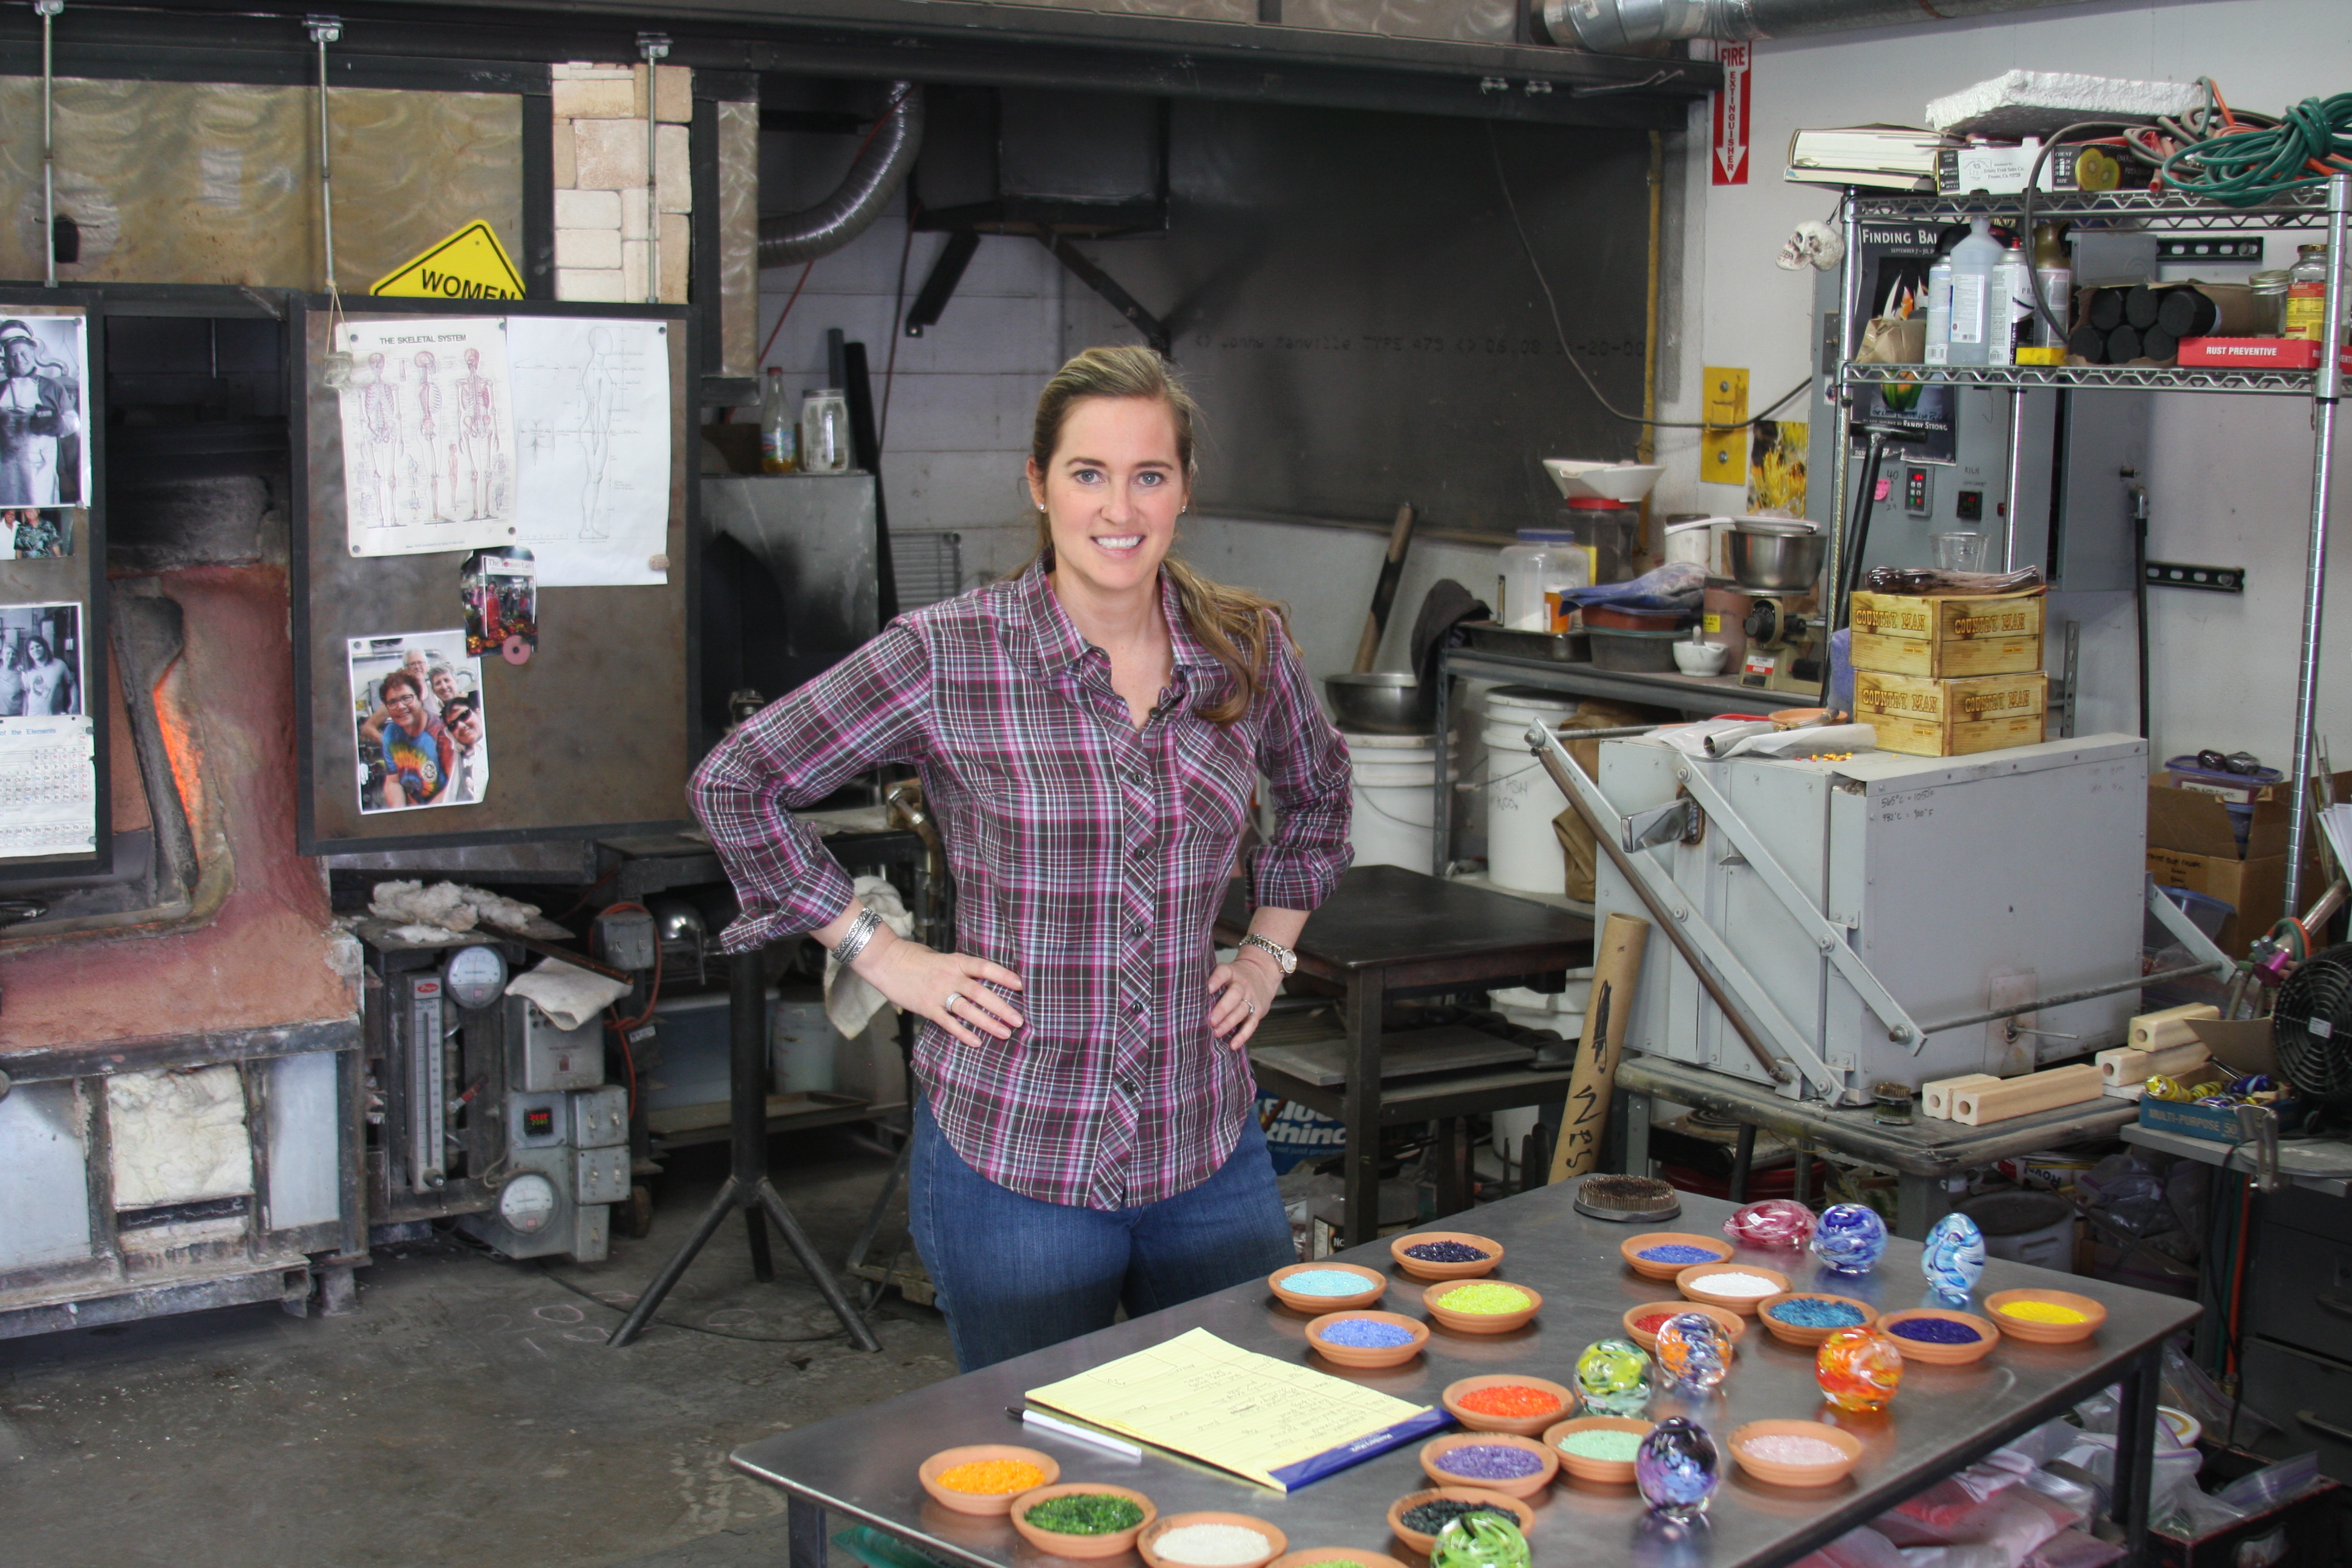
We knew to come a few minutes early, be ready to get our creative groove on, and to wear non flammable clothes. Yup, non flammable. Not a day to wear the J Lo green Grammy dress. Real honest to goodness 900 degree temperatures await.
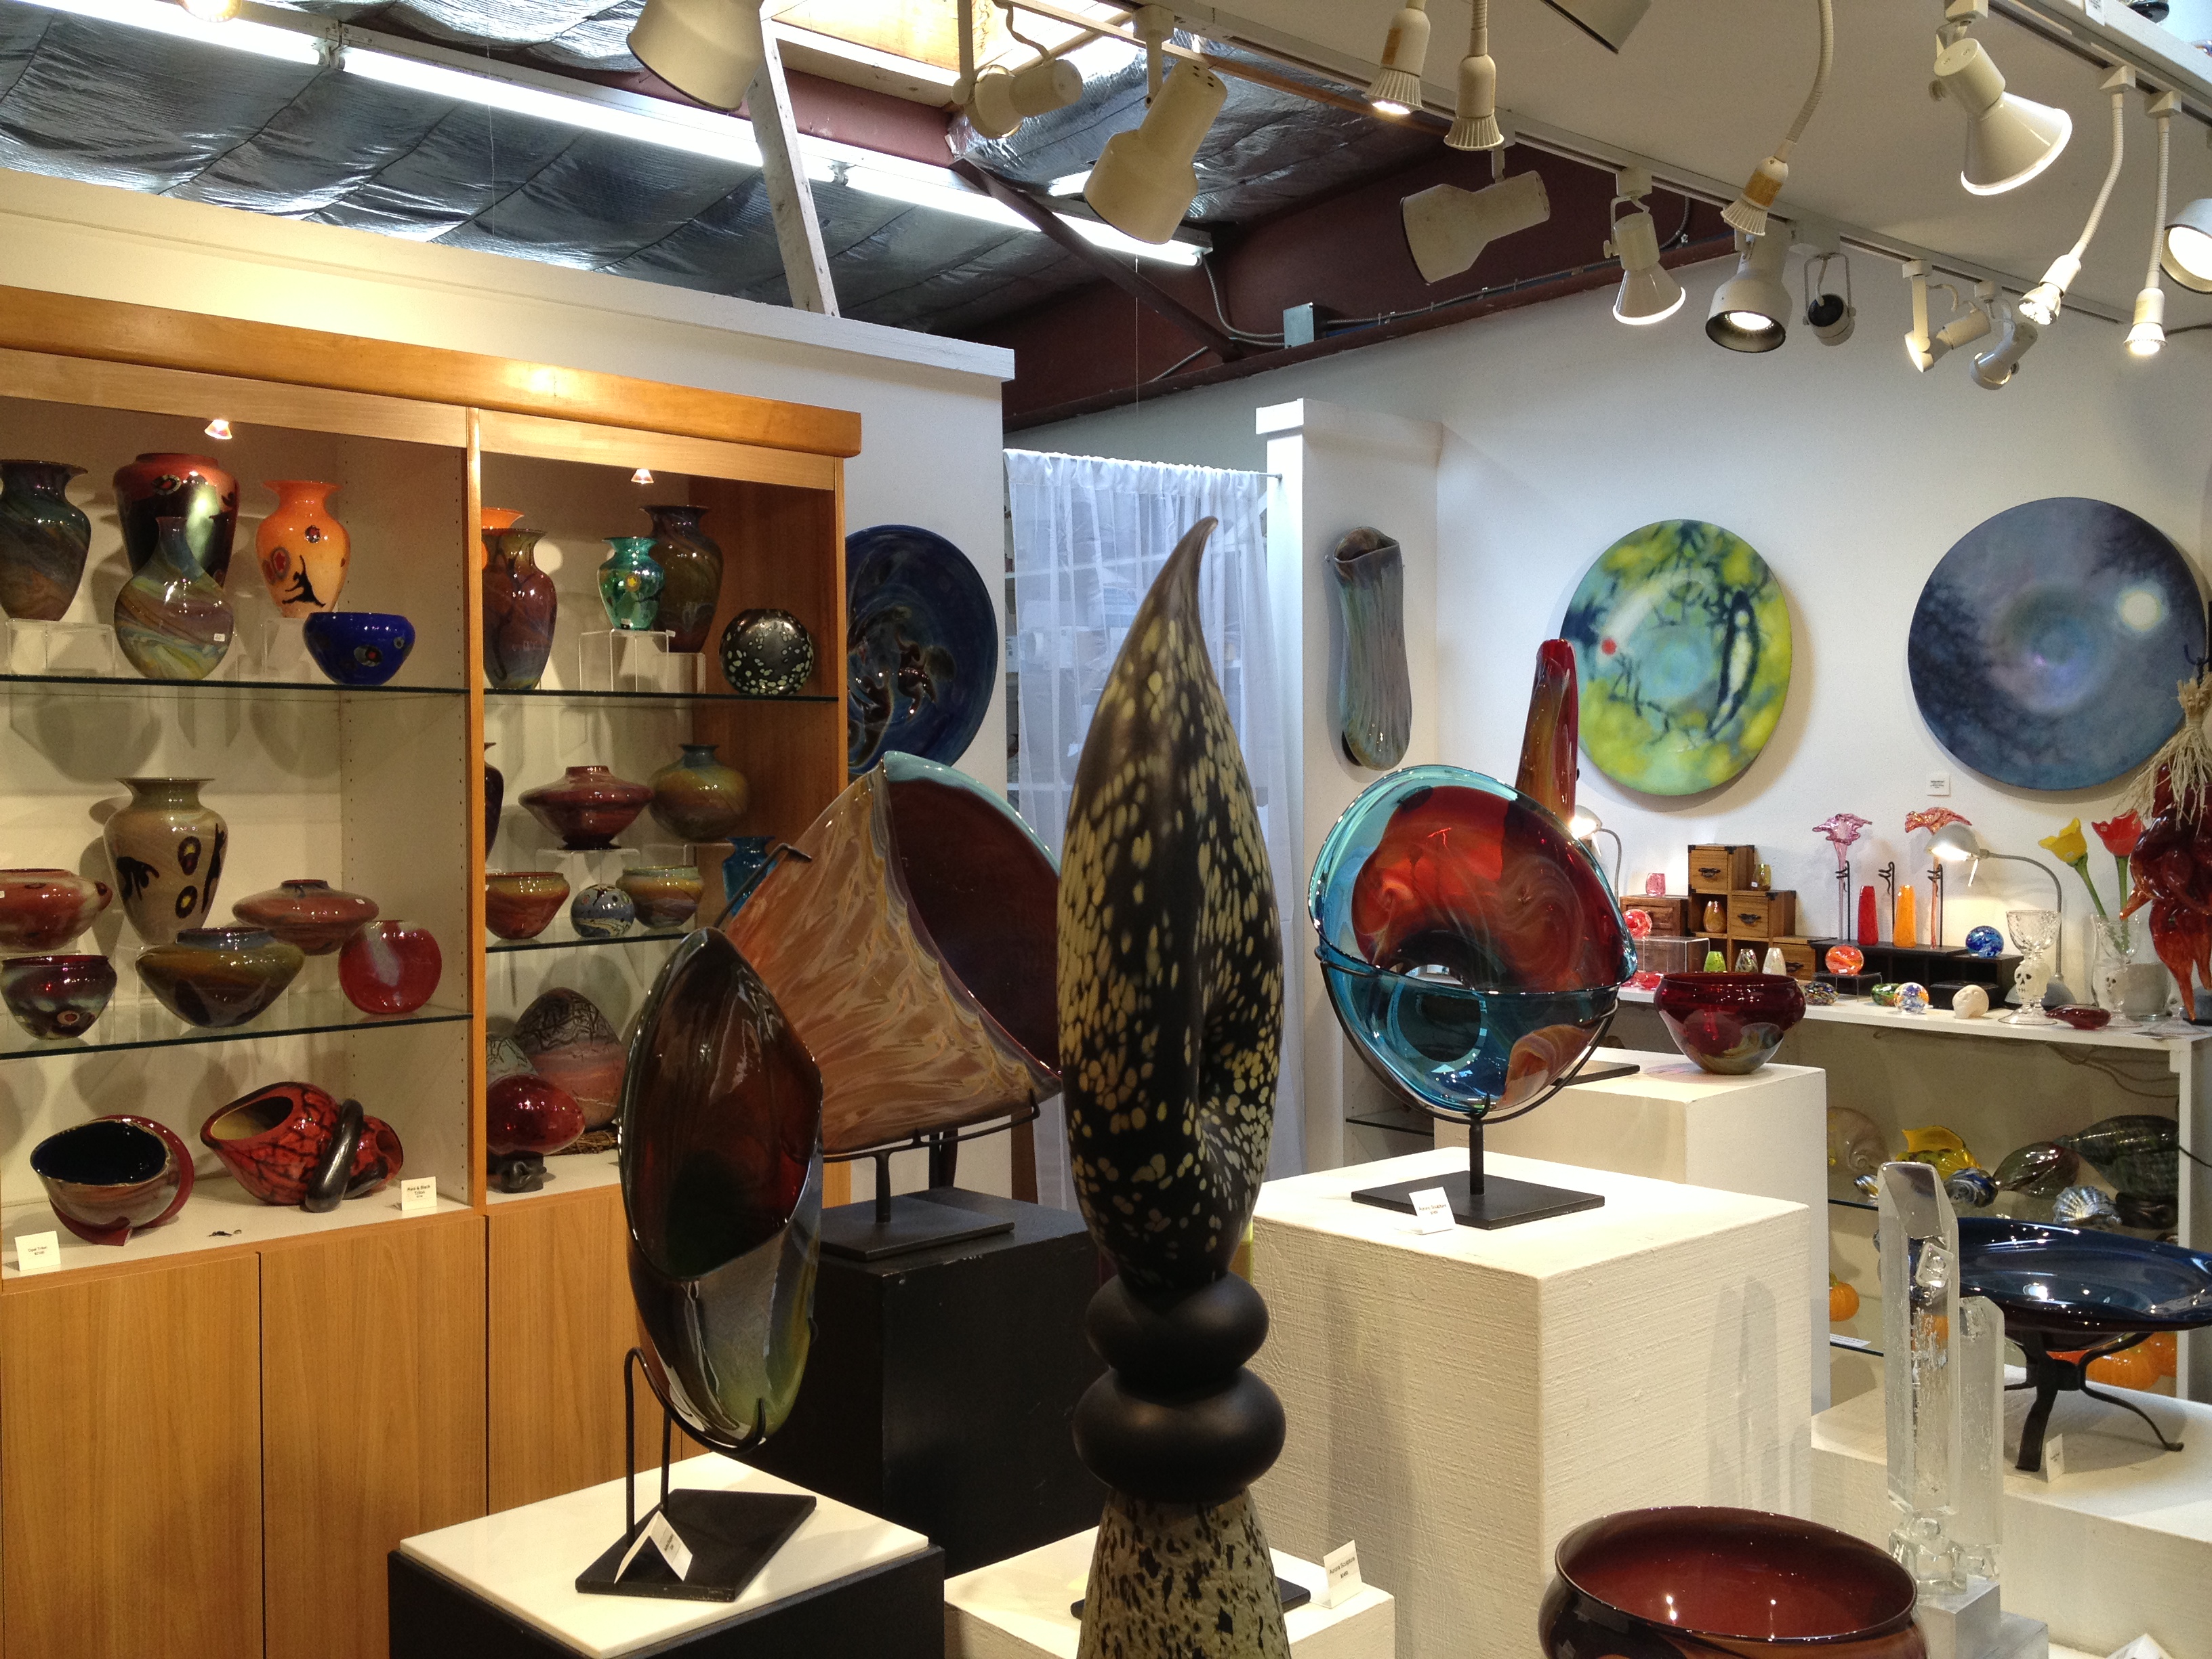
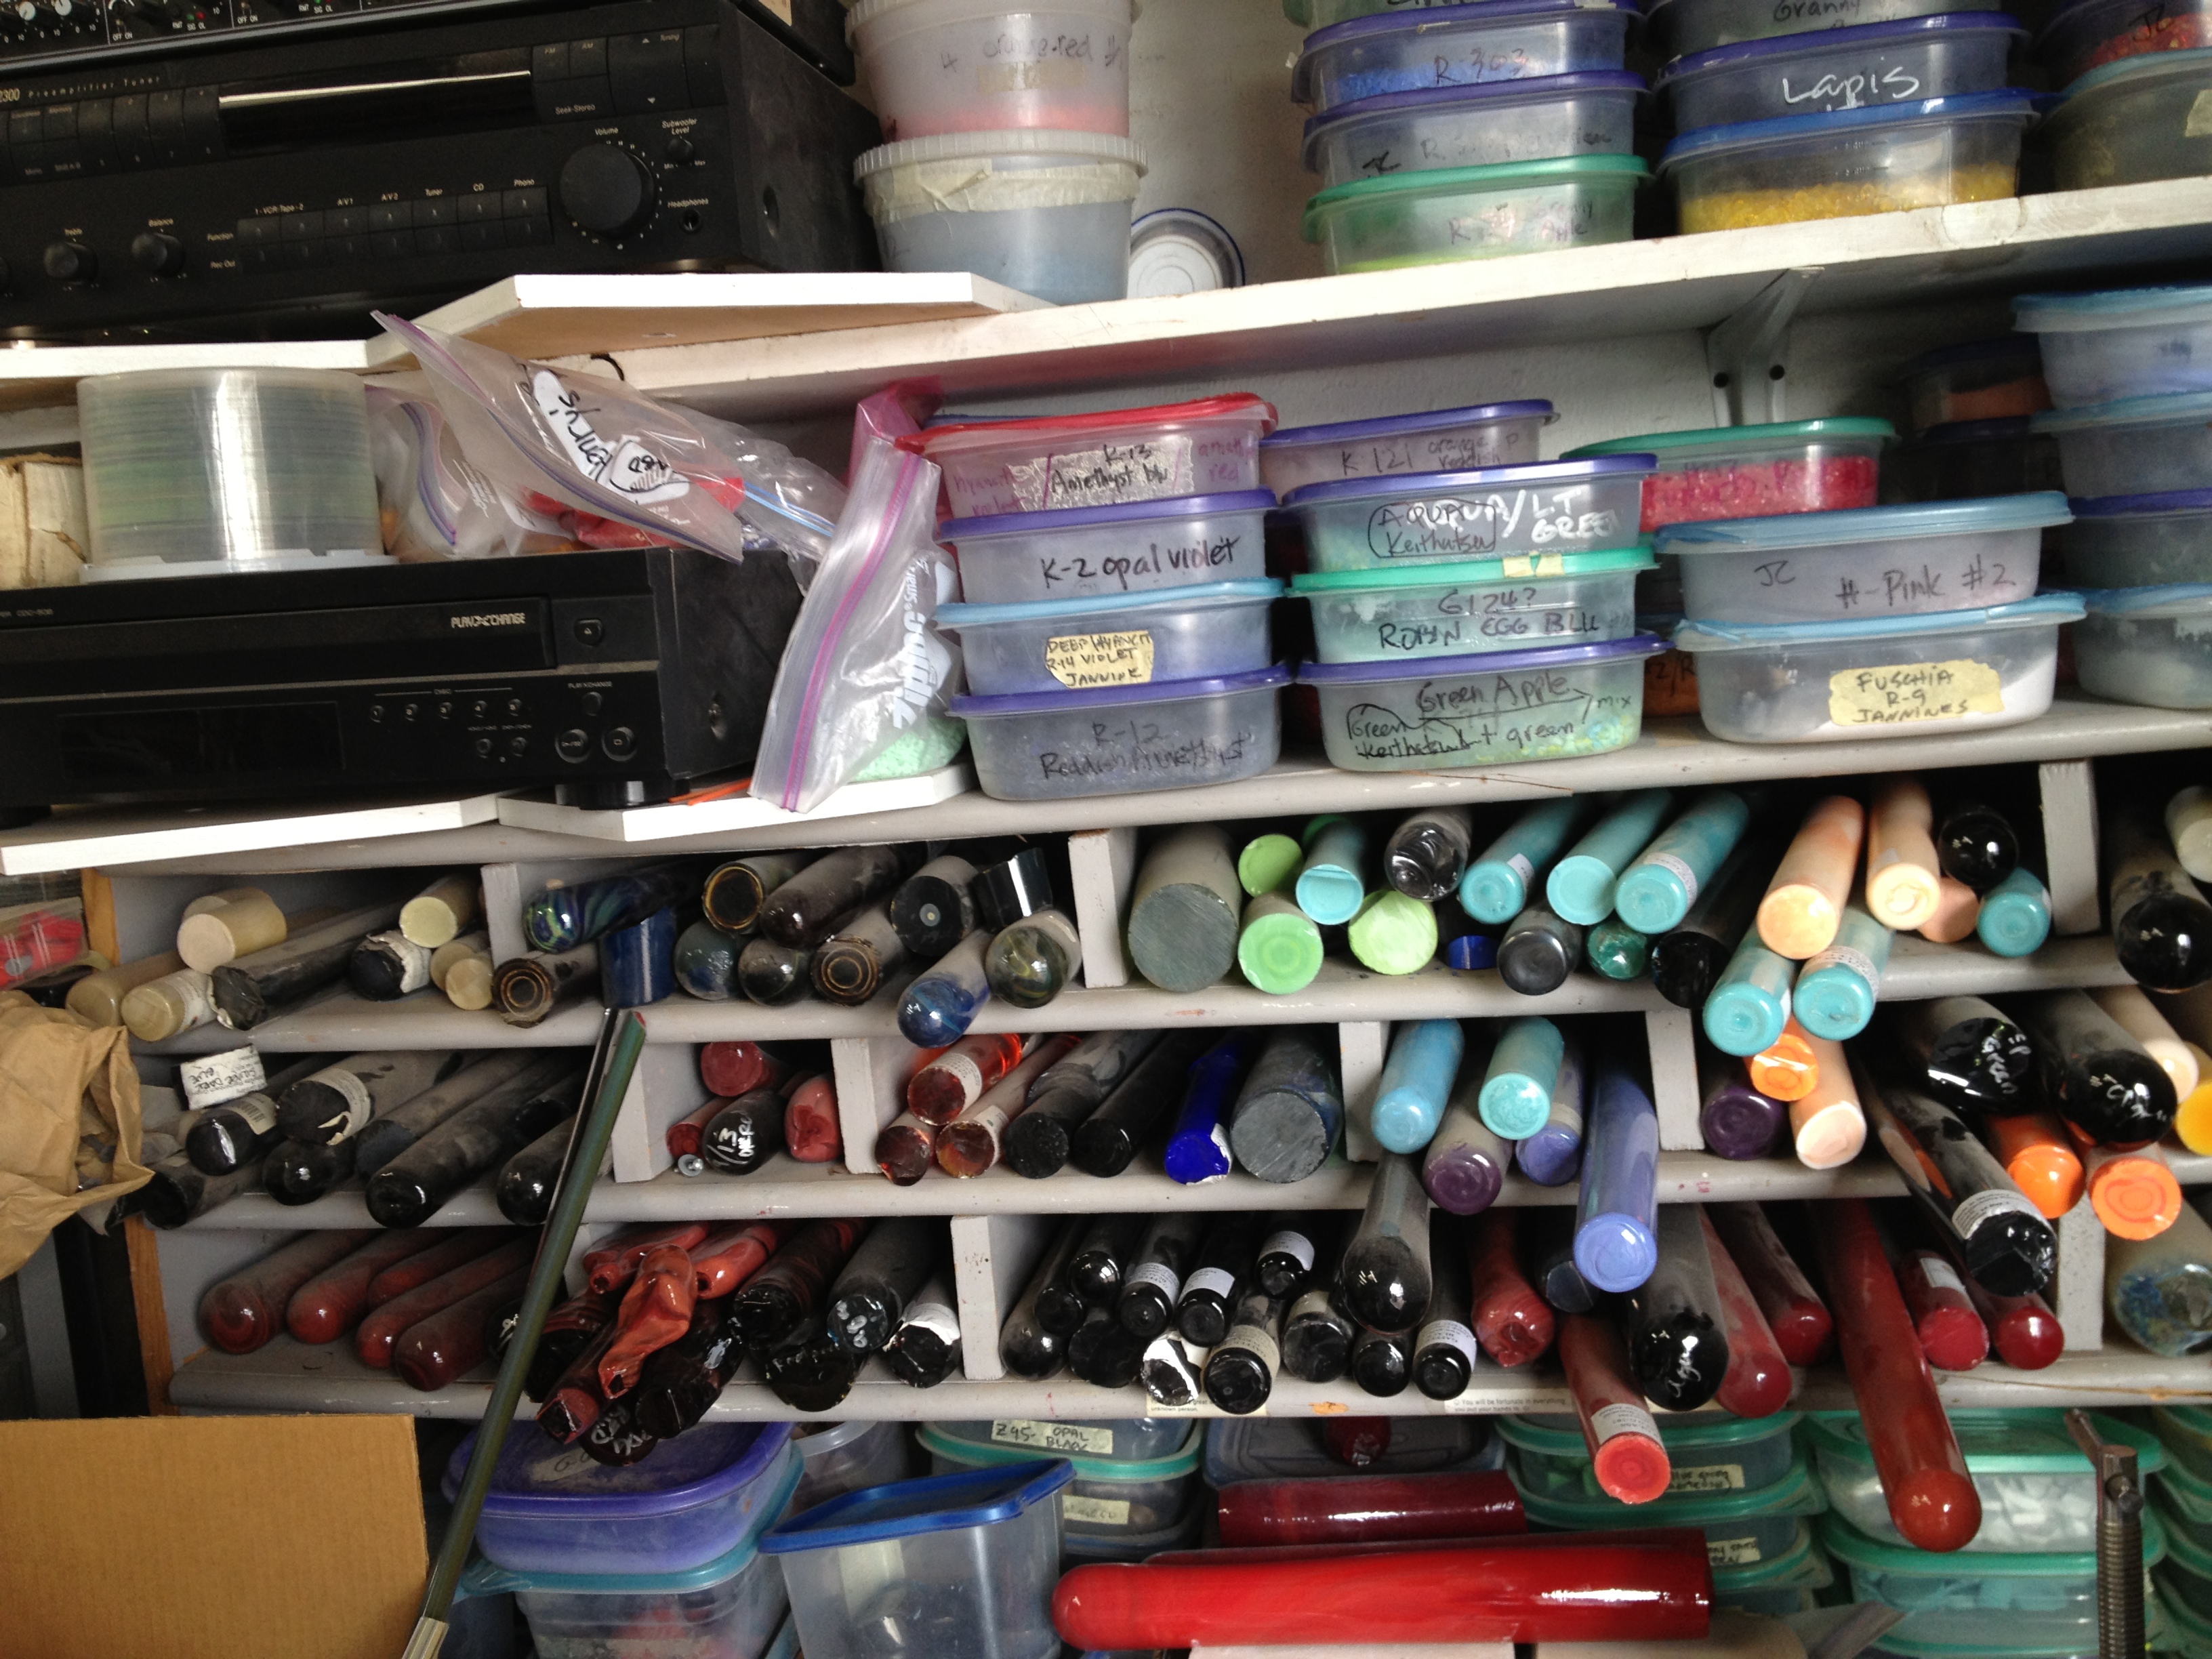
We arrived to the studio and chatted with our teacher Al, and Marcy, another glass artist and our classmates. Then we settled up the $60 fee per person ($50 additional if you wanted to make a second paperweight) and browsed the studio and workroom.

The fires are toasty! Can you imagine the heat in the air say oh, come July?! Holy dog days of summer. Thankfully for us it was a chilly winter day so it was nice to cozy up next to the fires.
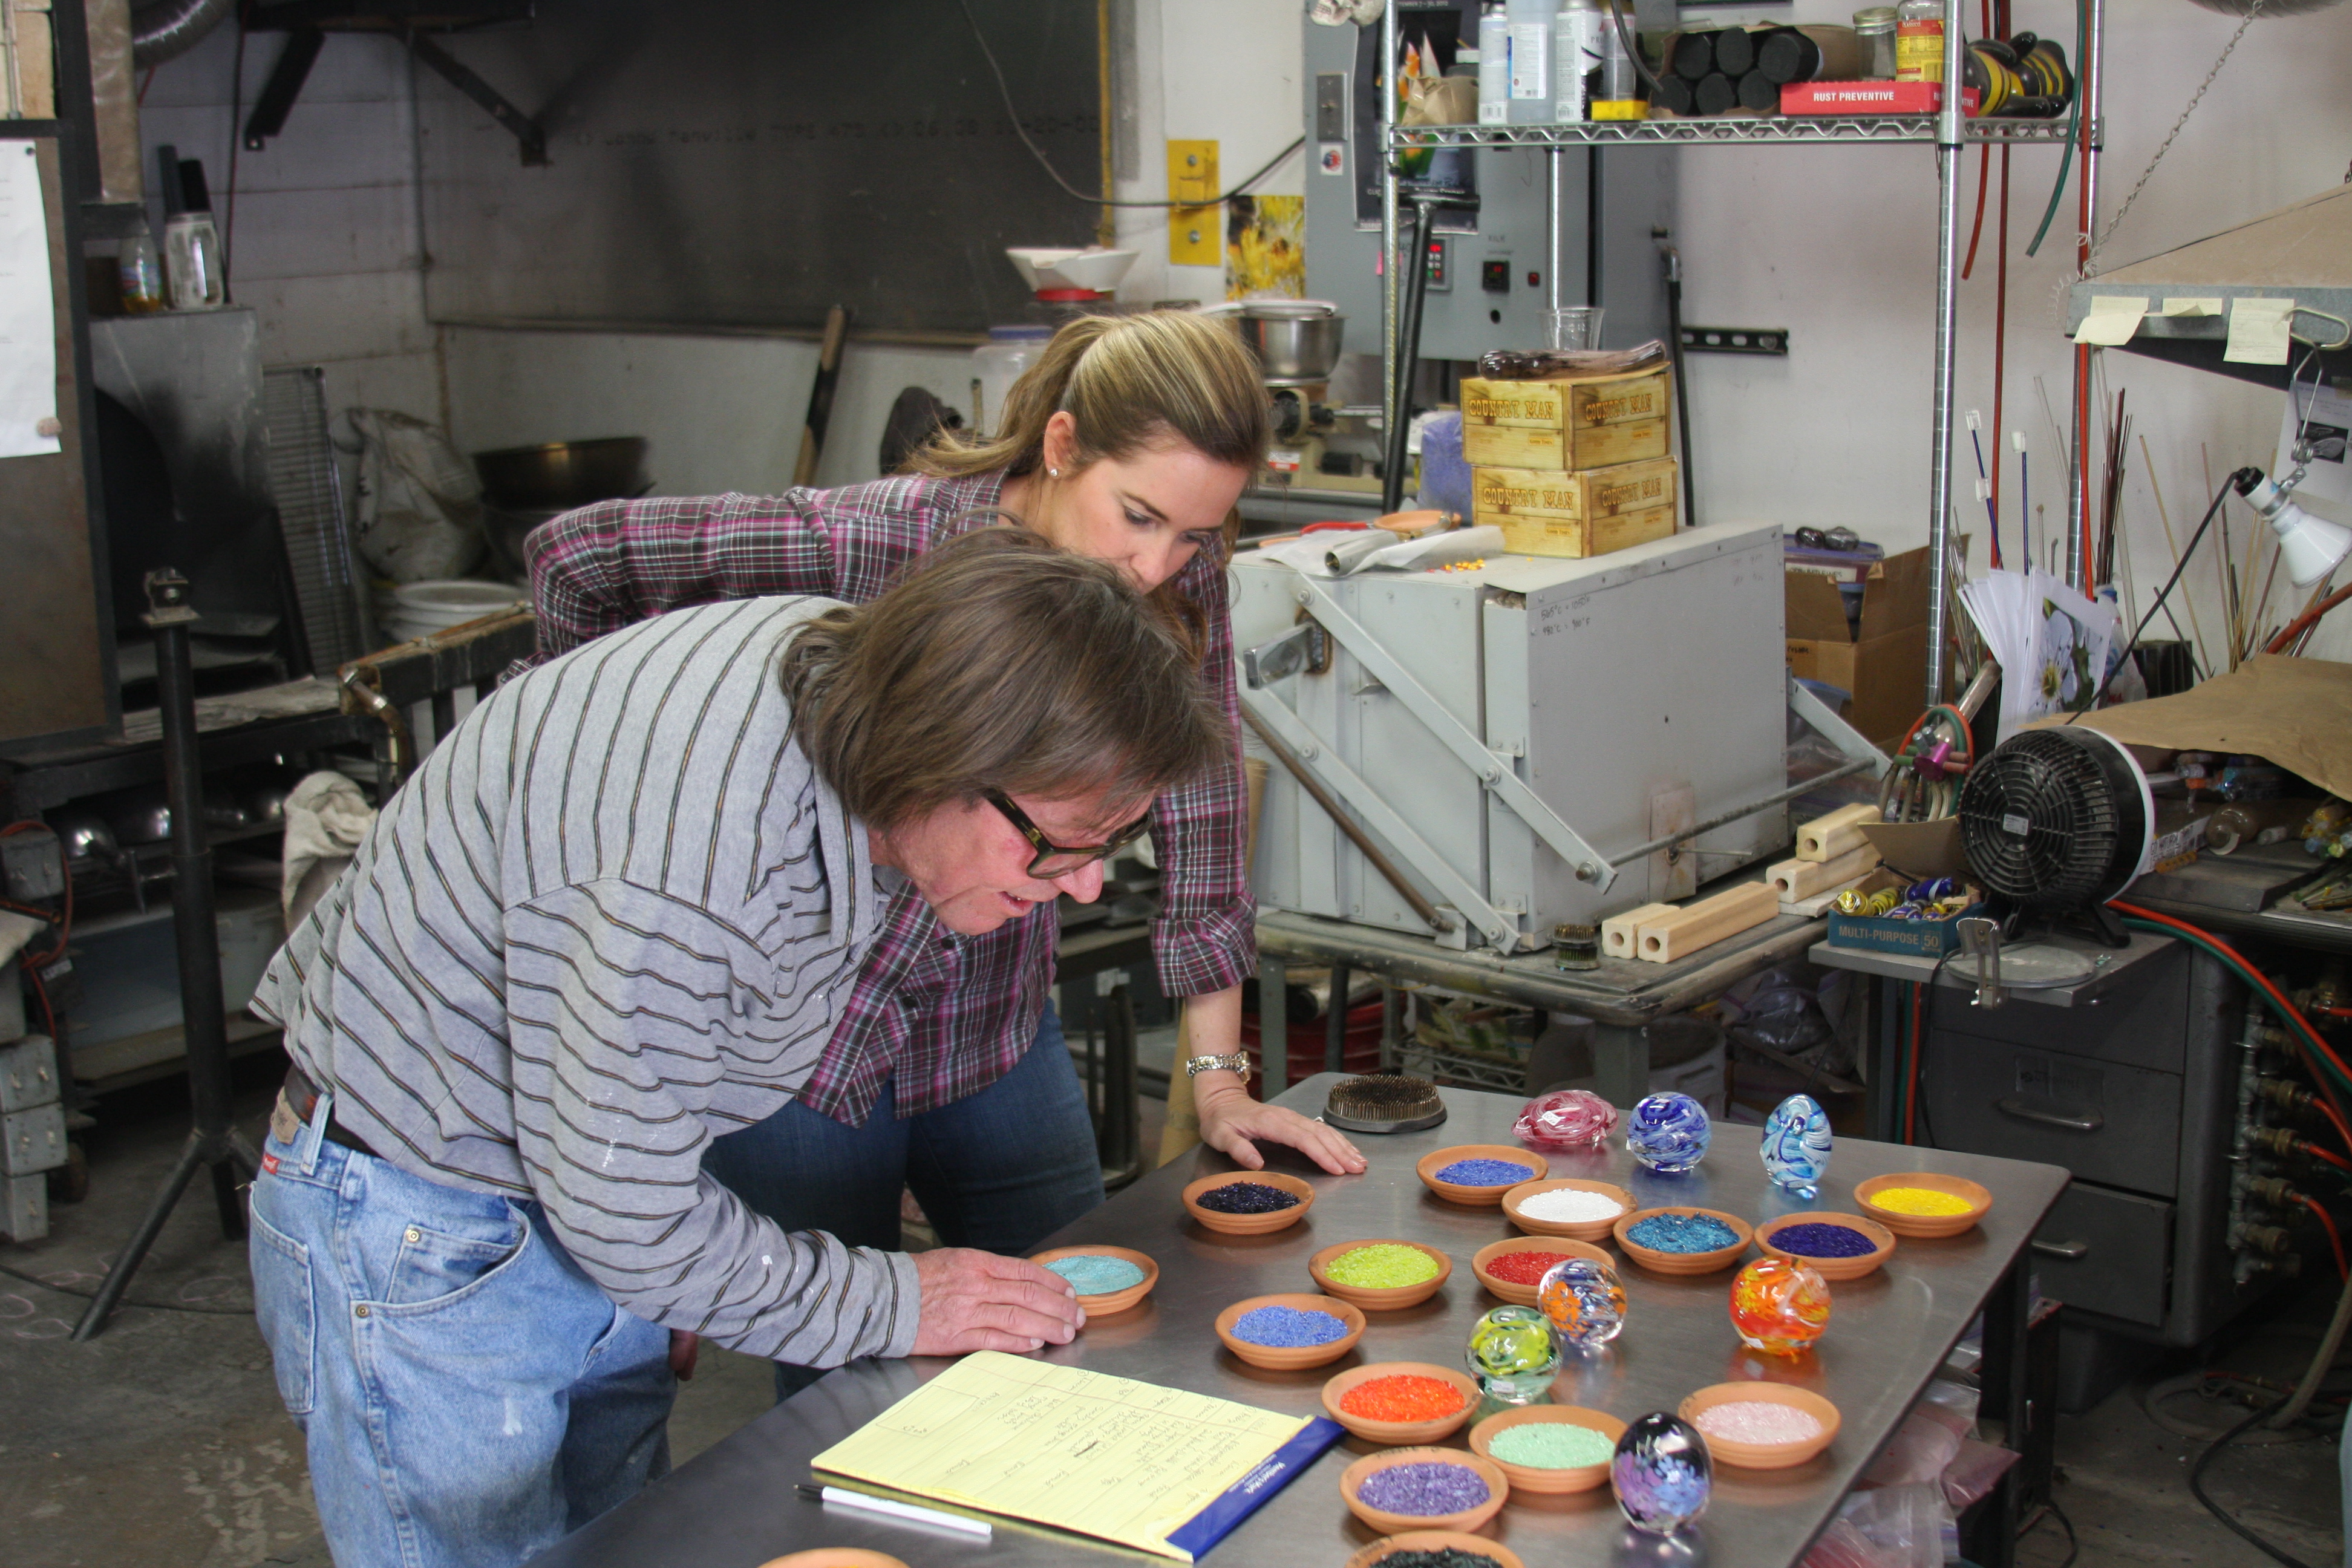
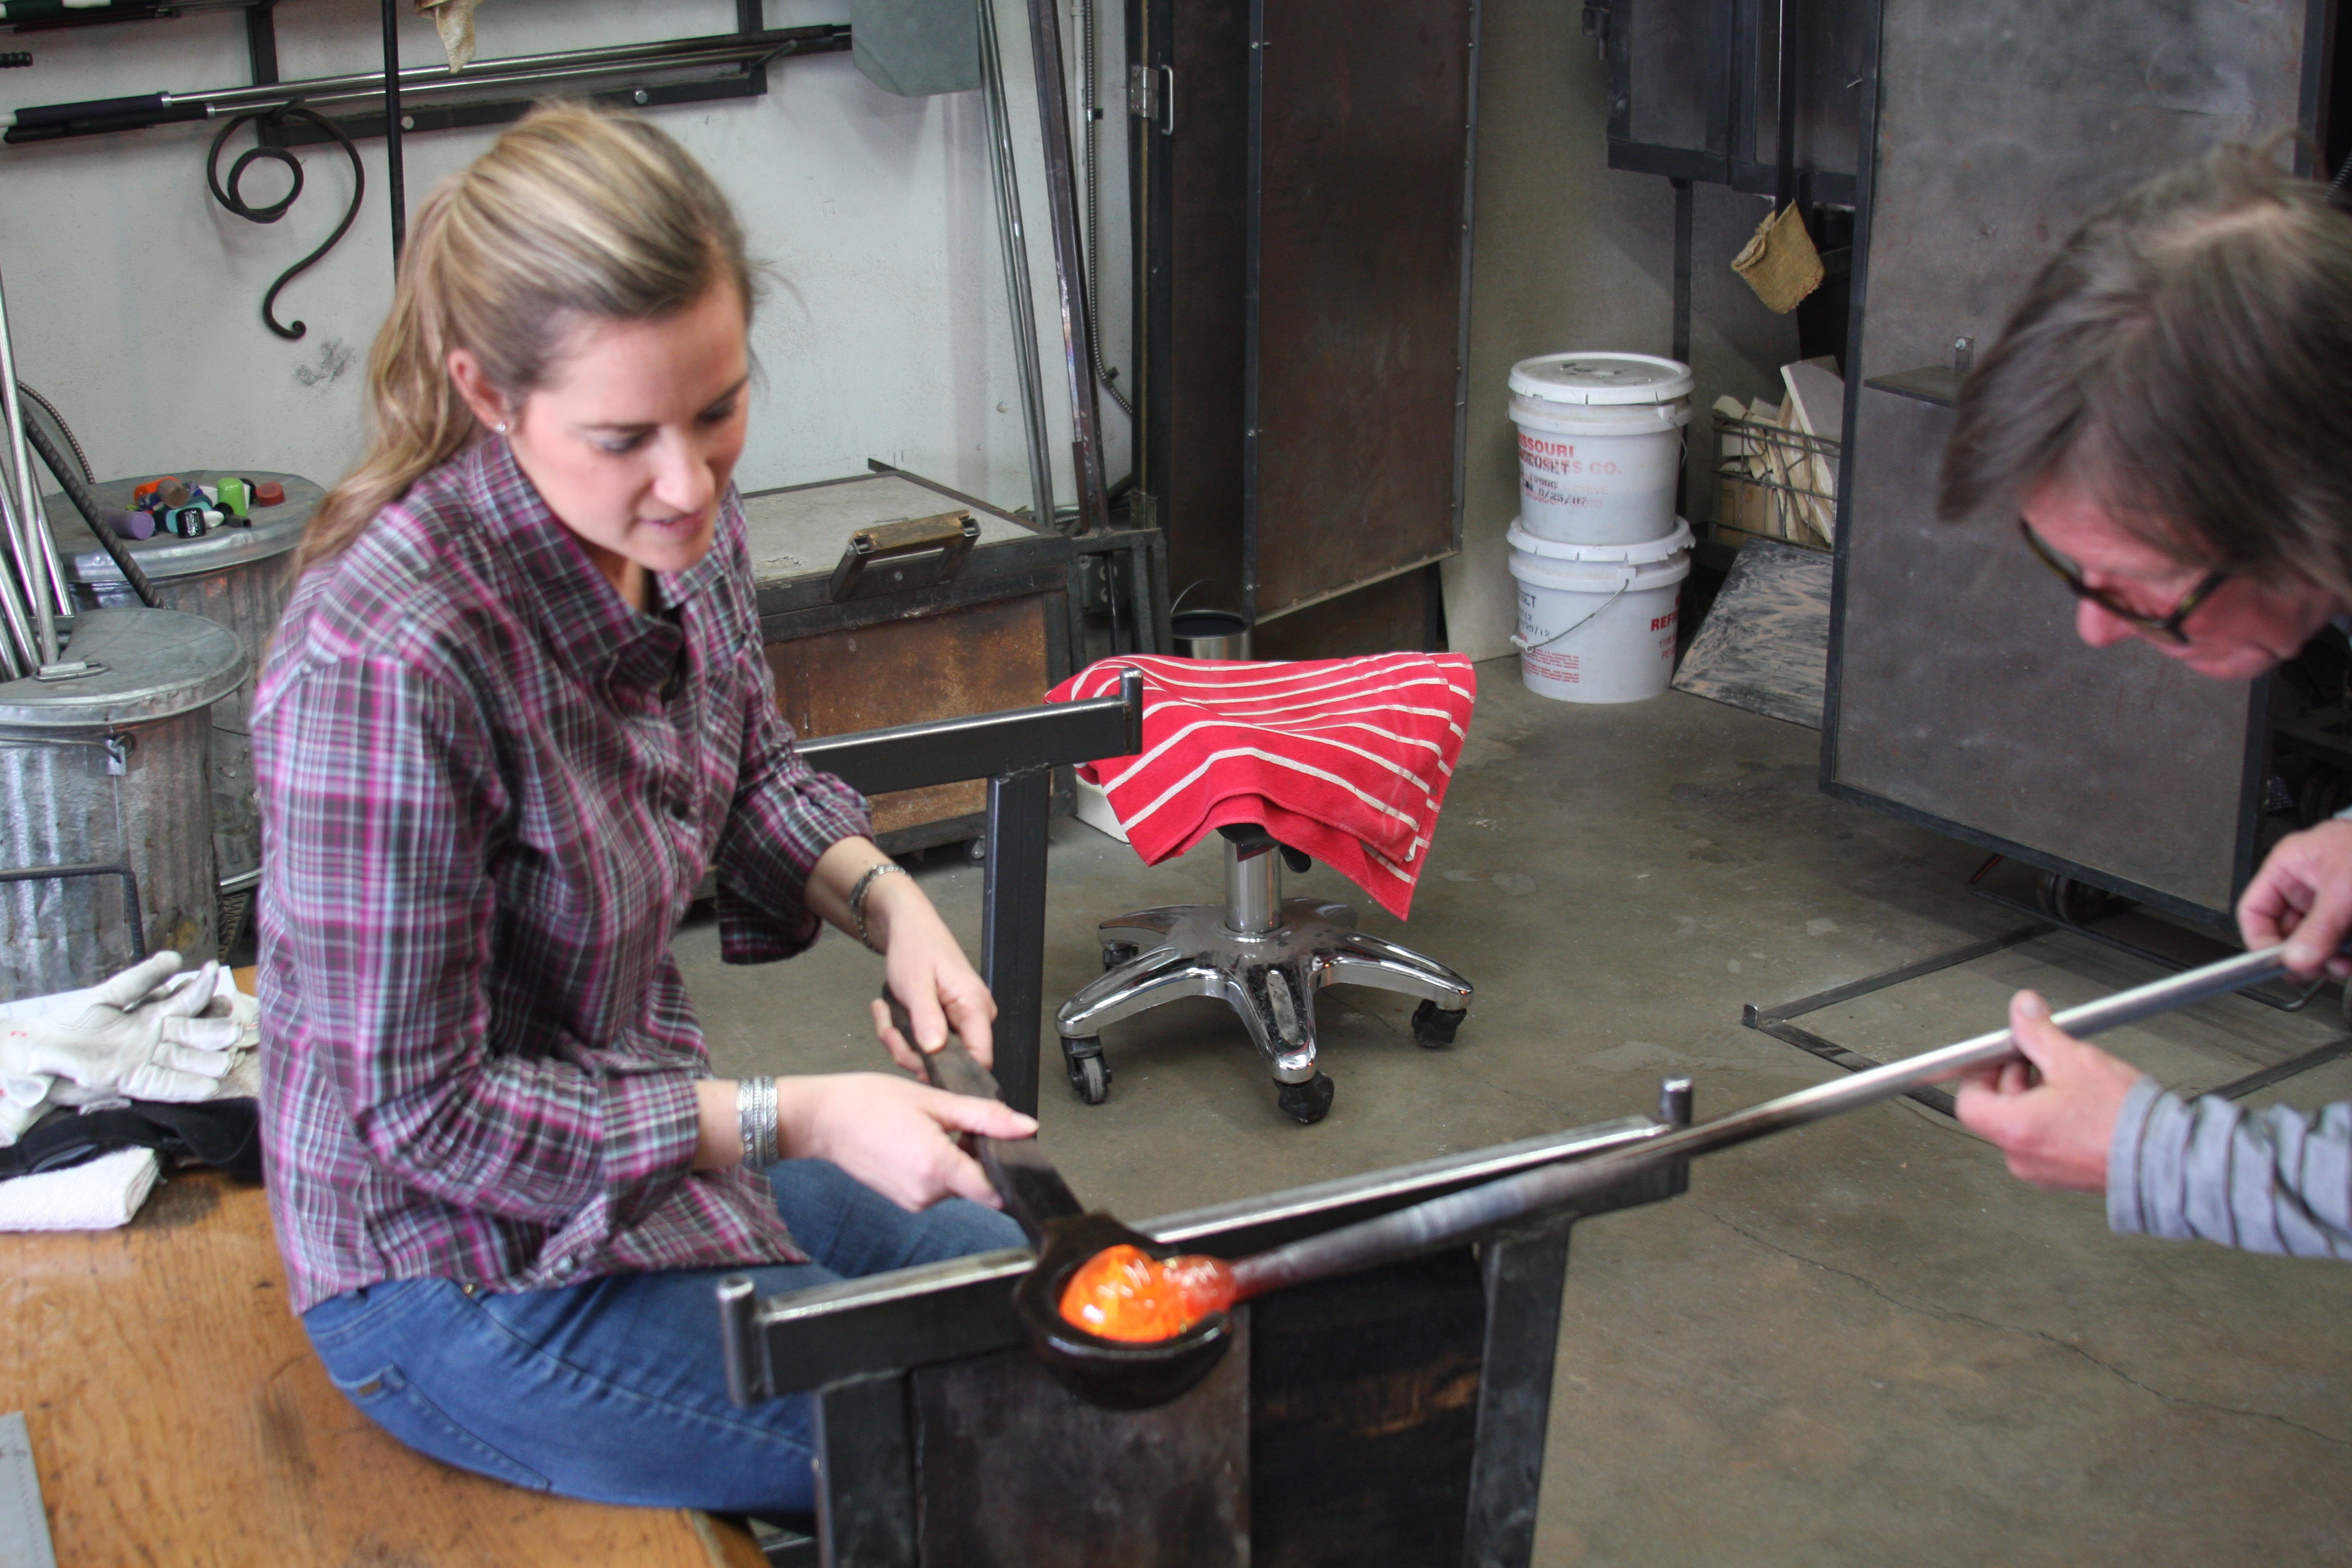
We started by getting an overview from Al on how the process worked, the materials we’d use, and the precautions that need to be made.
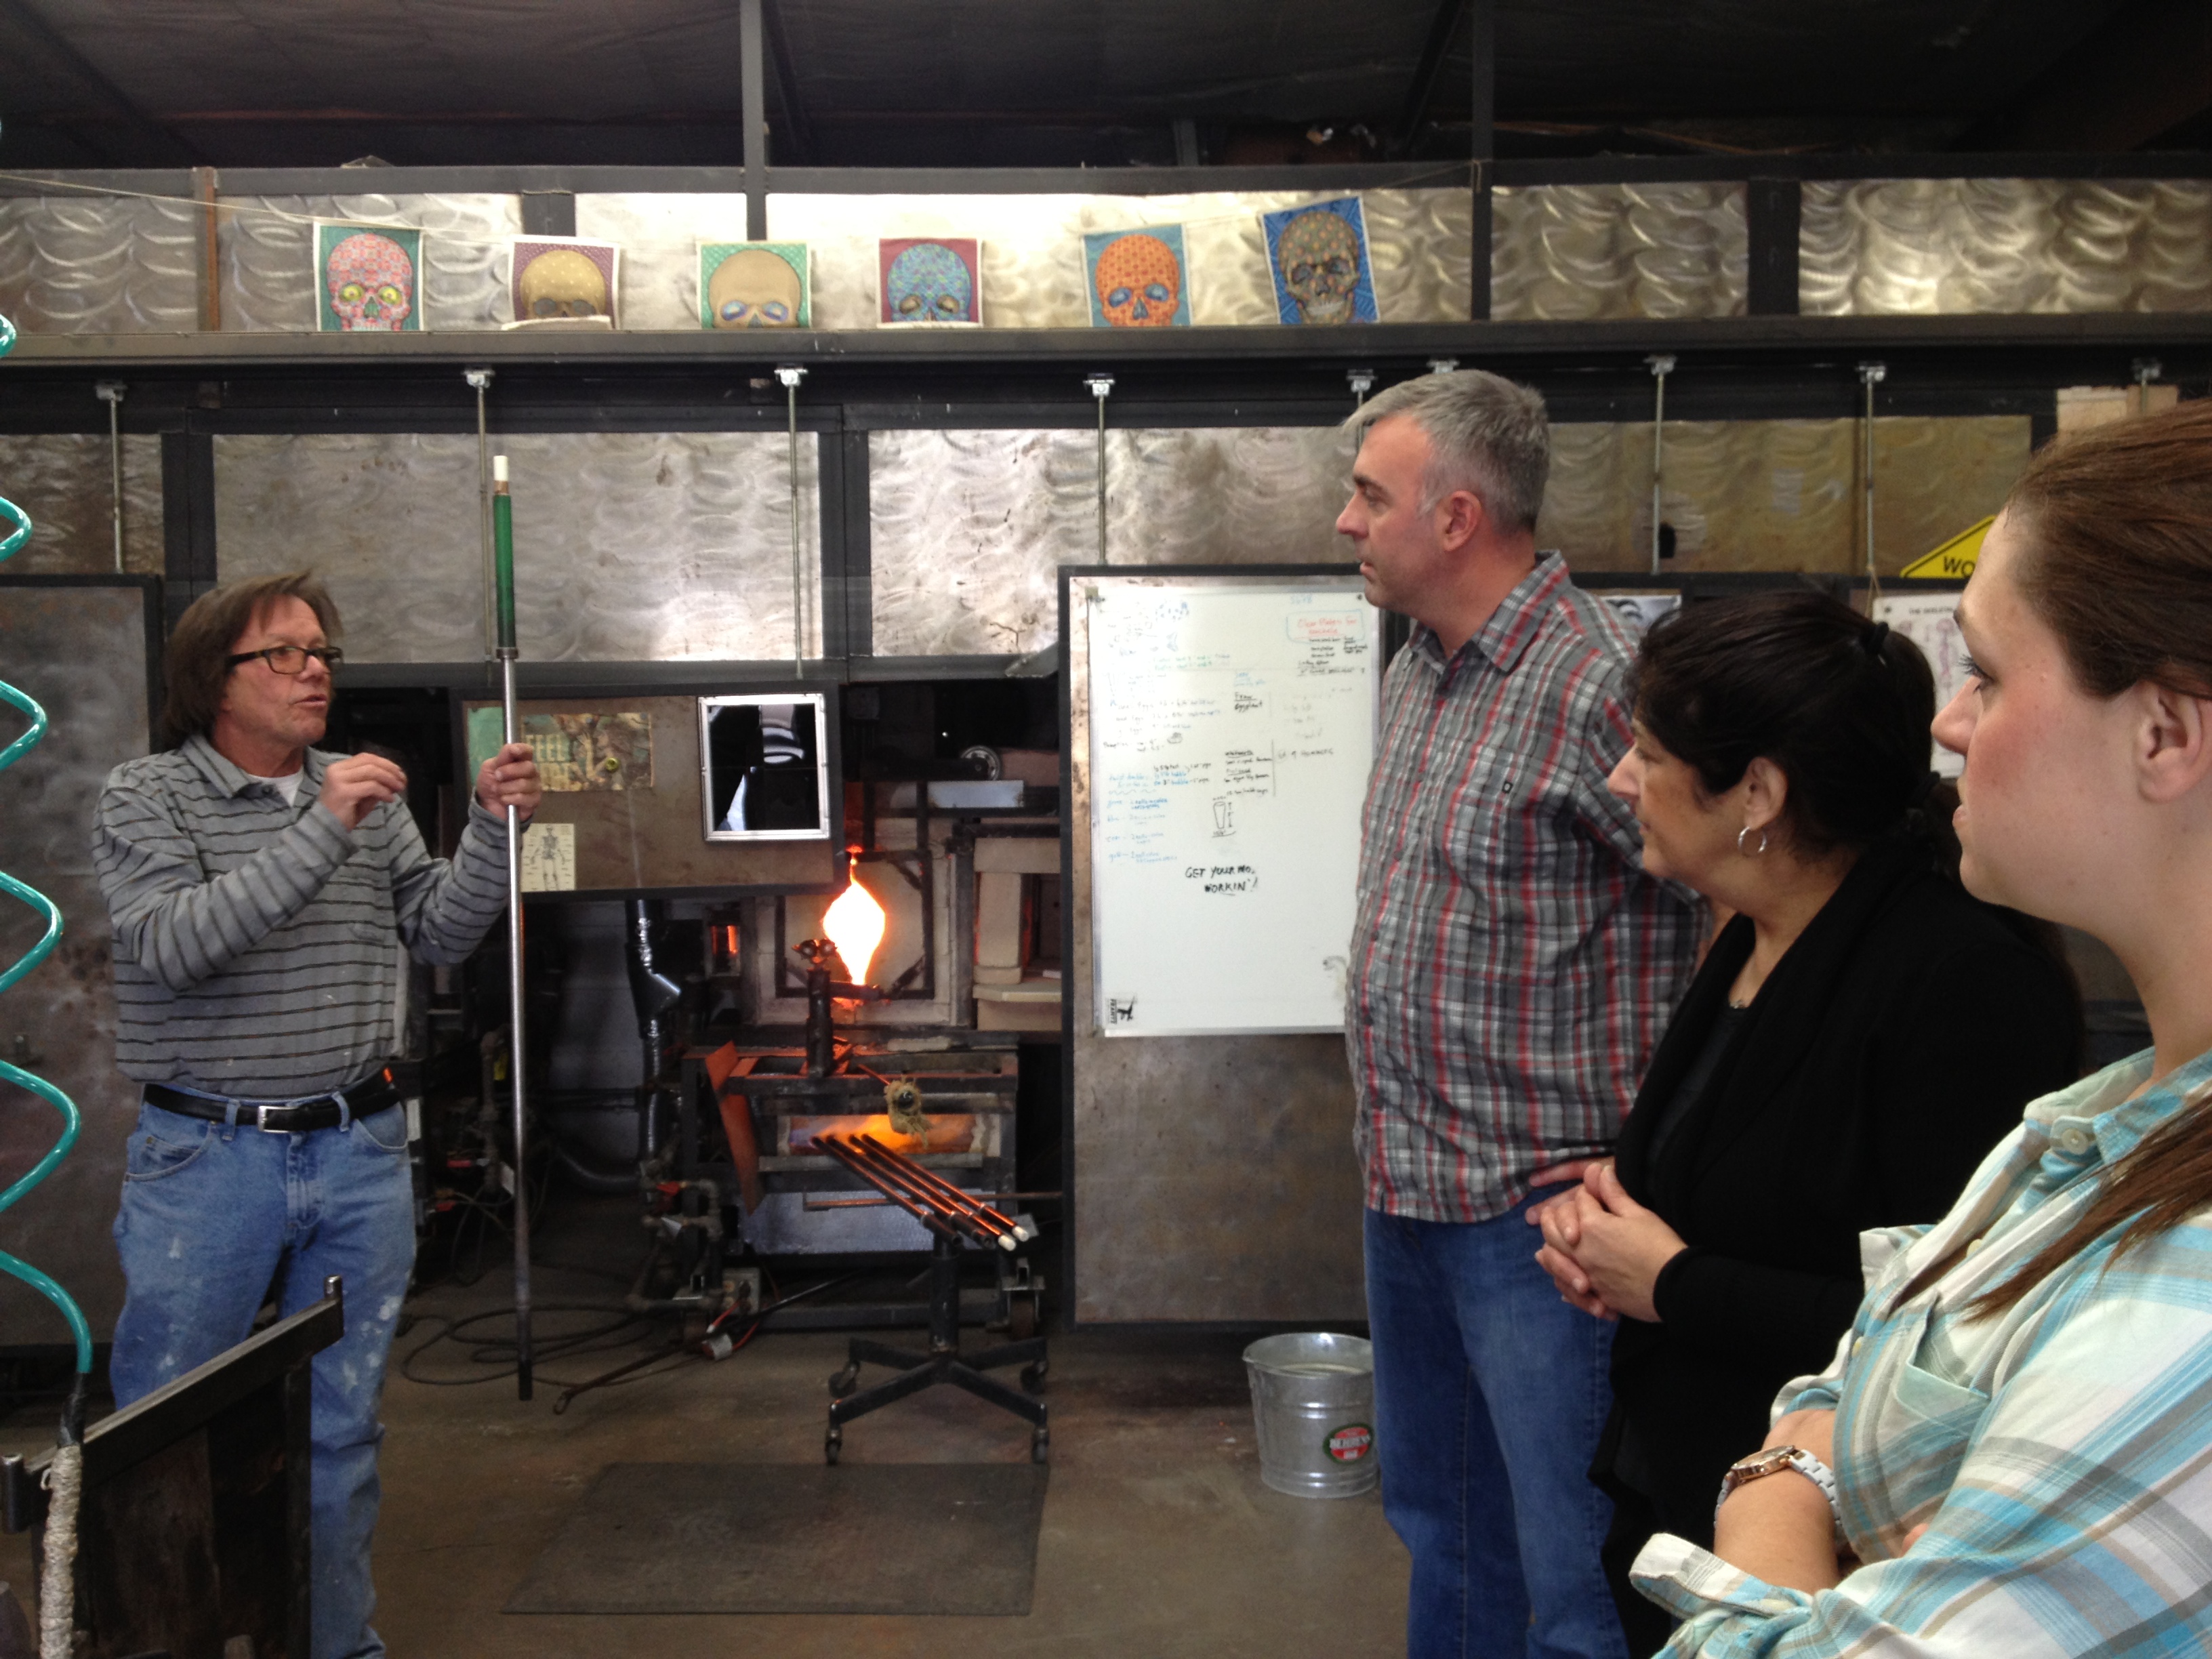
(Artist and class instruction far left- Al Leedom)
Then we each decided what shape paperweight we’d like to make, round or egg shape. Both the hubs and I settled on round.
(Egg shape is in the back right)
Next you discuss how the various bubble designs/features are made within the paperweights and determine if you’d like to include those in your design. I wanted a few large bubbles, my hubby decided he didn’t want to add any additional bubbles to the ones that often occur naturally during the process.
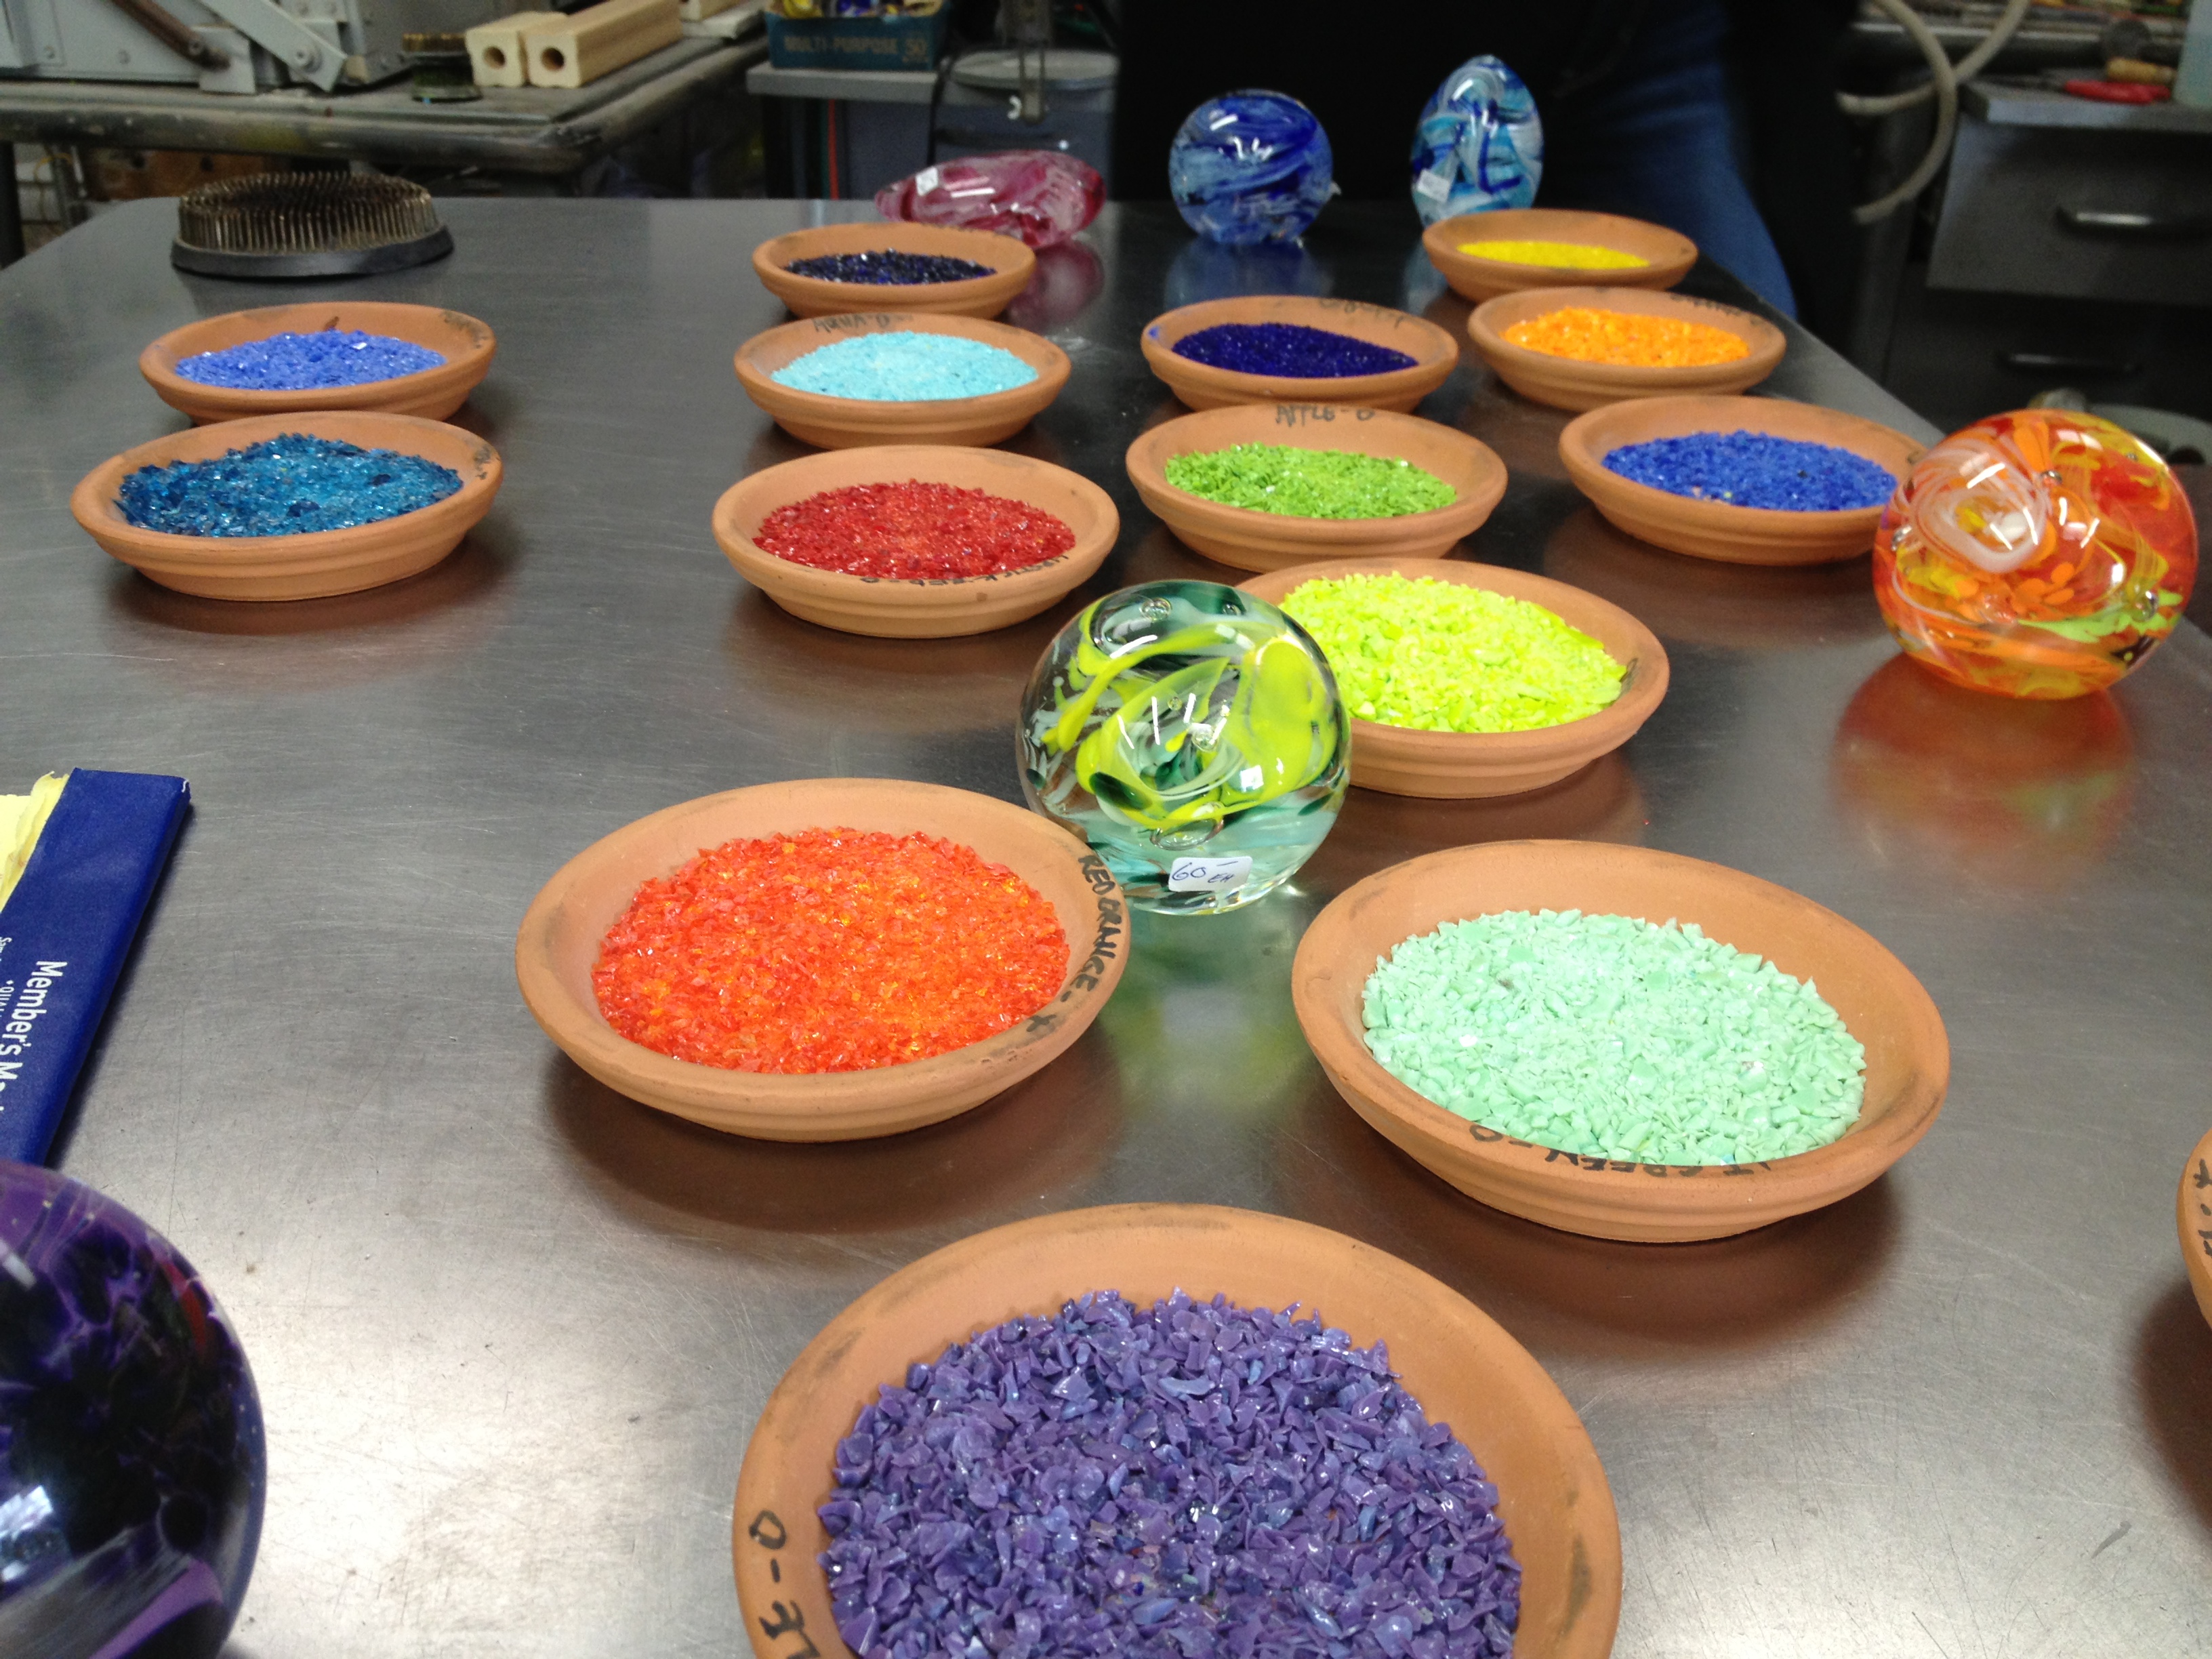
Then,…the moment I had been waiting for…COLORS! Did I mention I was a former fine arts major? OK, only my first year of college, but I so miss it and secretly hope that I could be the next Gauguin? Shh. A girl can dream.
It is suggested you stick with just 3 colors so the colors don’t get muddled. Each dish is labeled with a “T” for transparent, or “O” for opaque. Apparently you need to try to include one transparent color per paperweight. Al was great about discussing which colors tended to overpower etc. and helping you plan the two “layers” of color. More on the layers later.
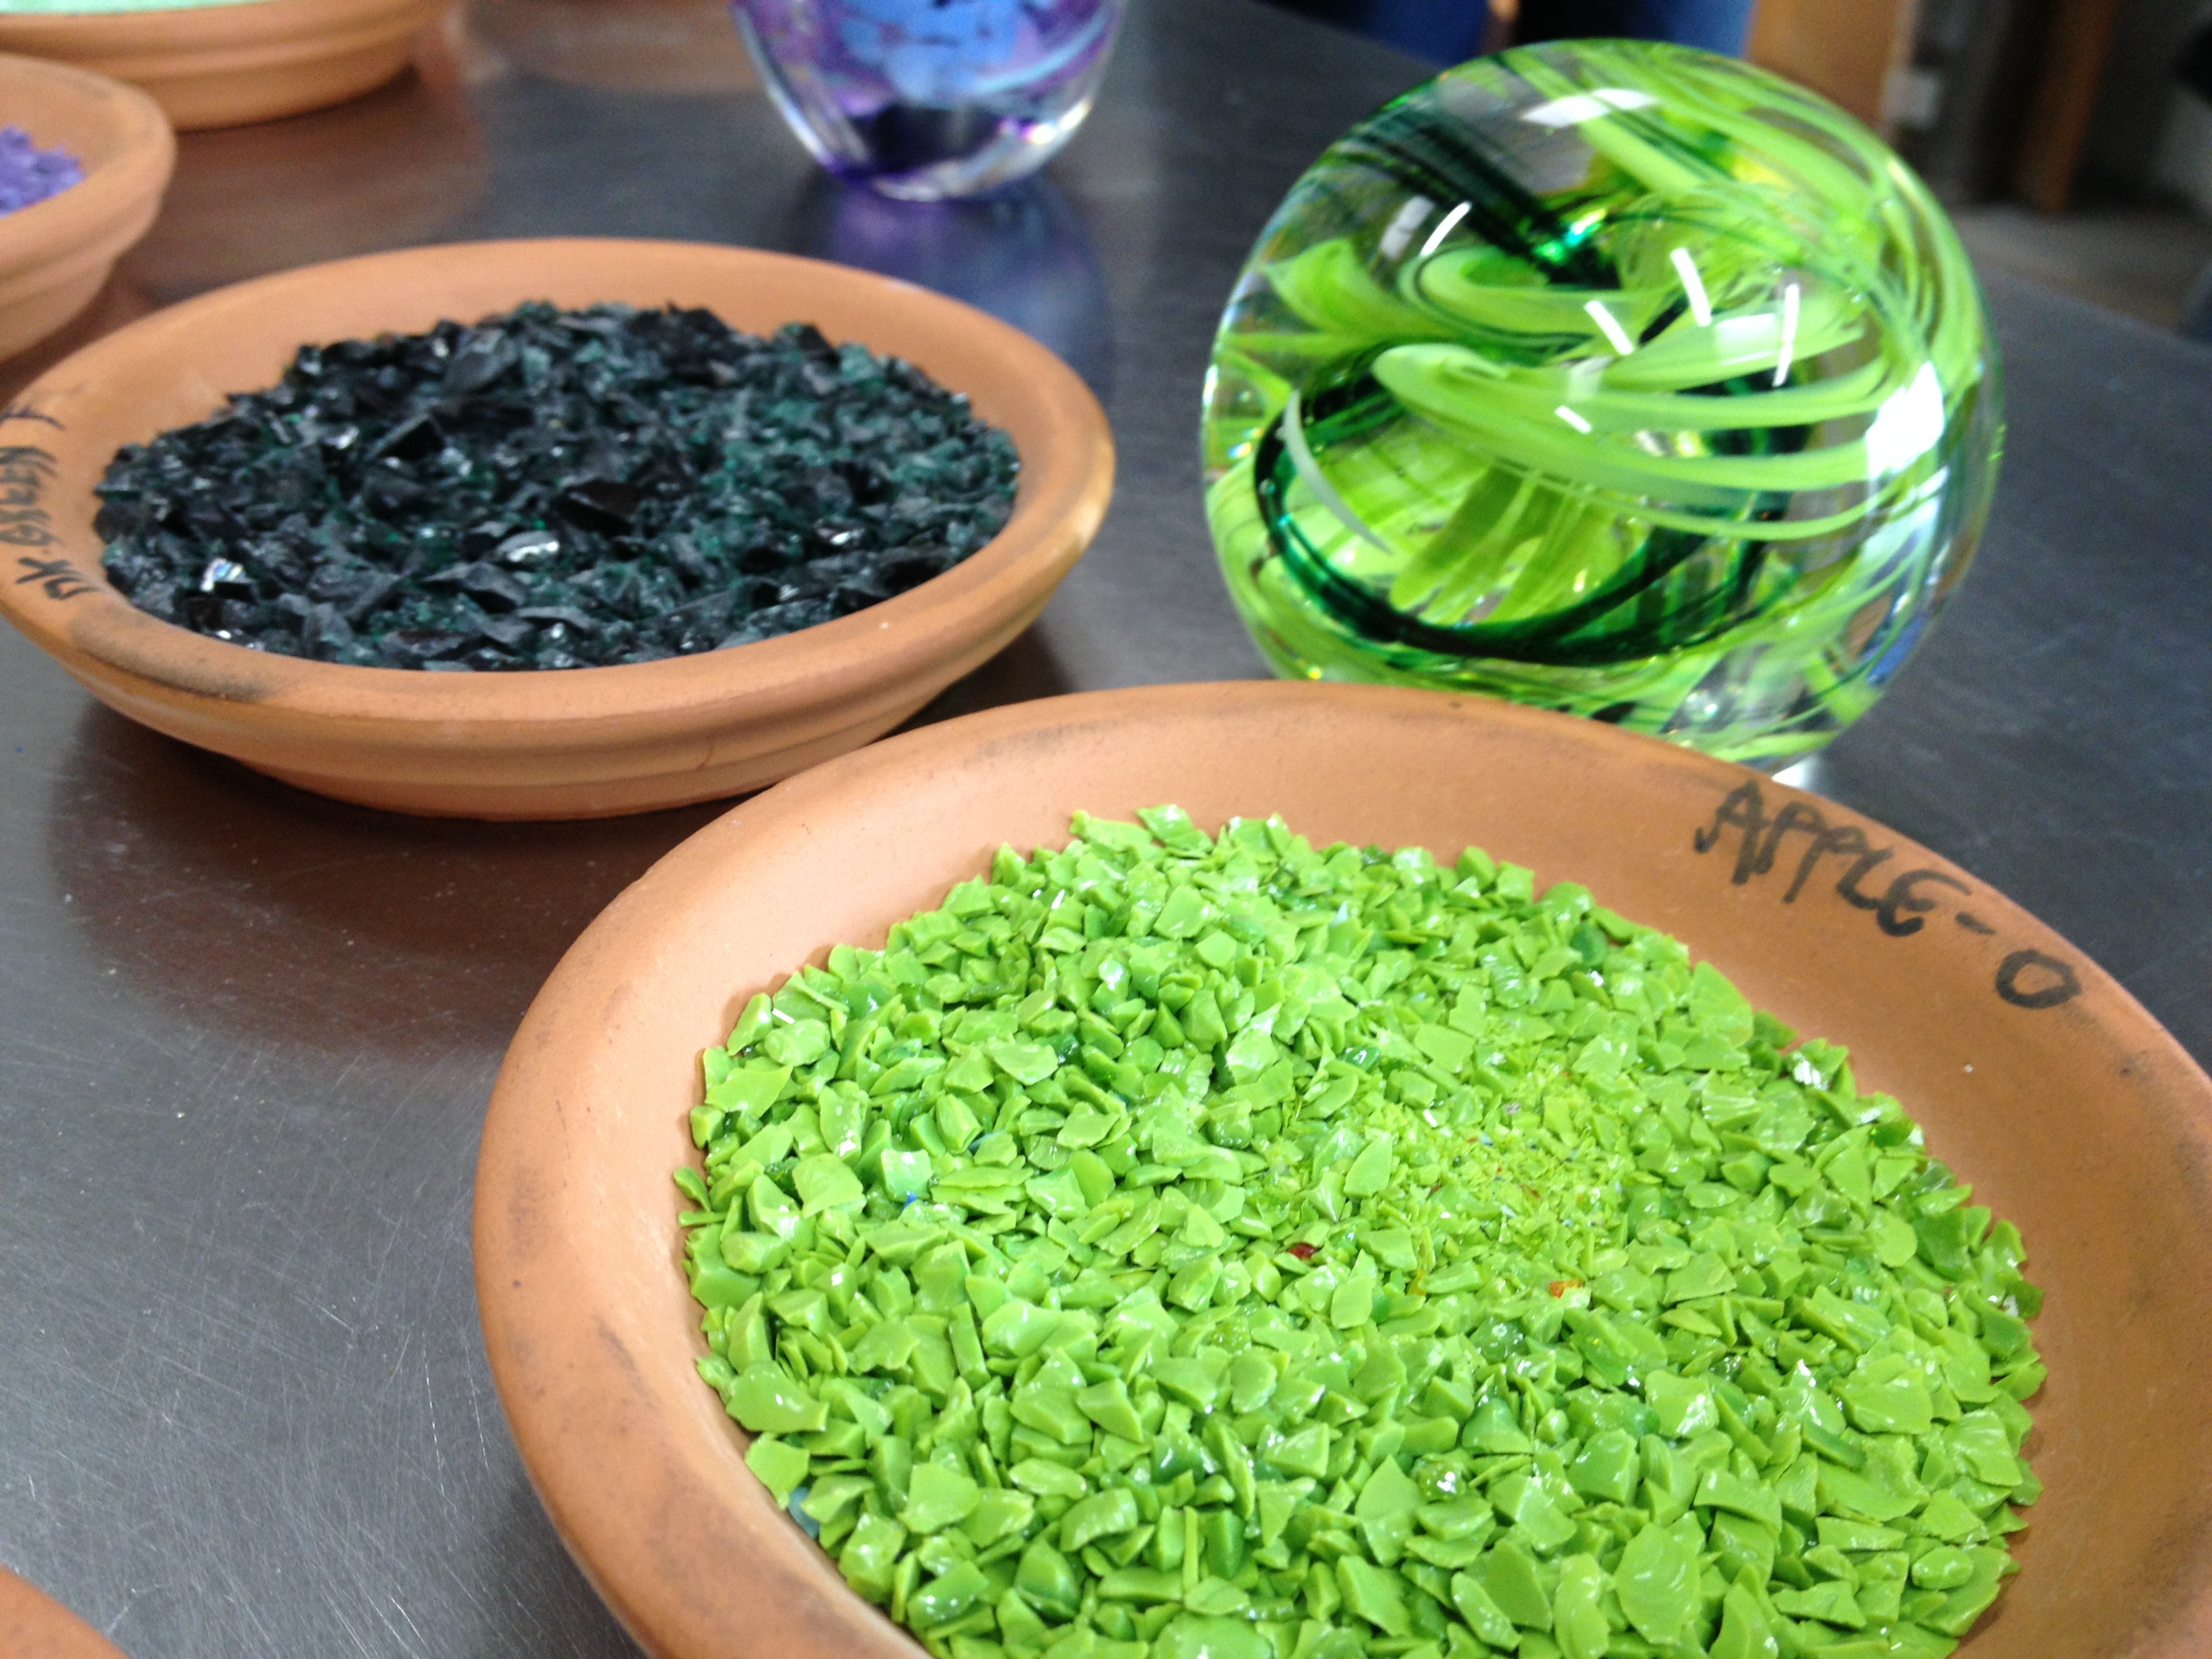
(Note the “O” on the lip of the saucer)
Al wrote down what each person selected for shape, colors and special bubble effects desired. Then you select an order. Our class was only 5 people which was amazing. We were all able to move about the workspace and be very involved rather than being seated. Our group was super fun and from the very get go you knew this experience was going to be amazing!
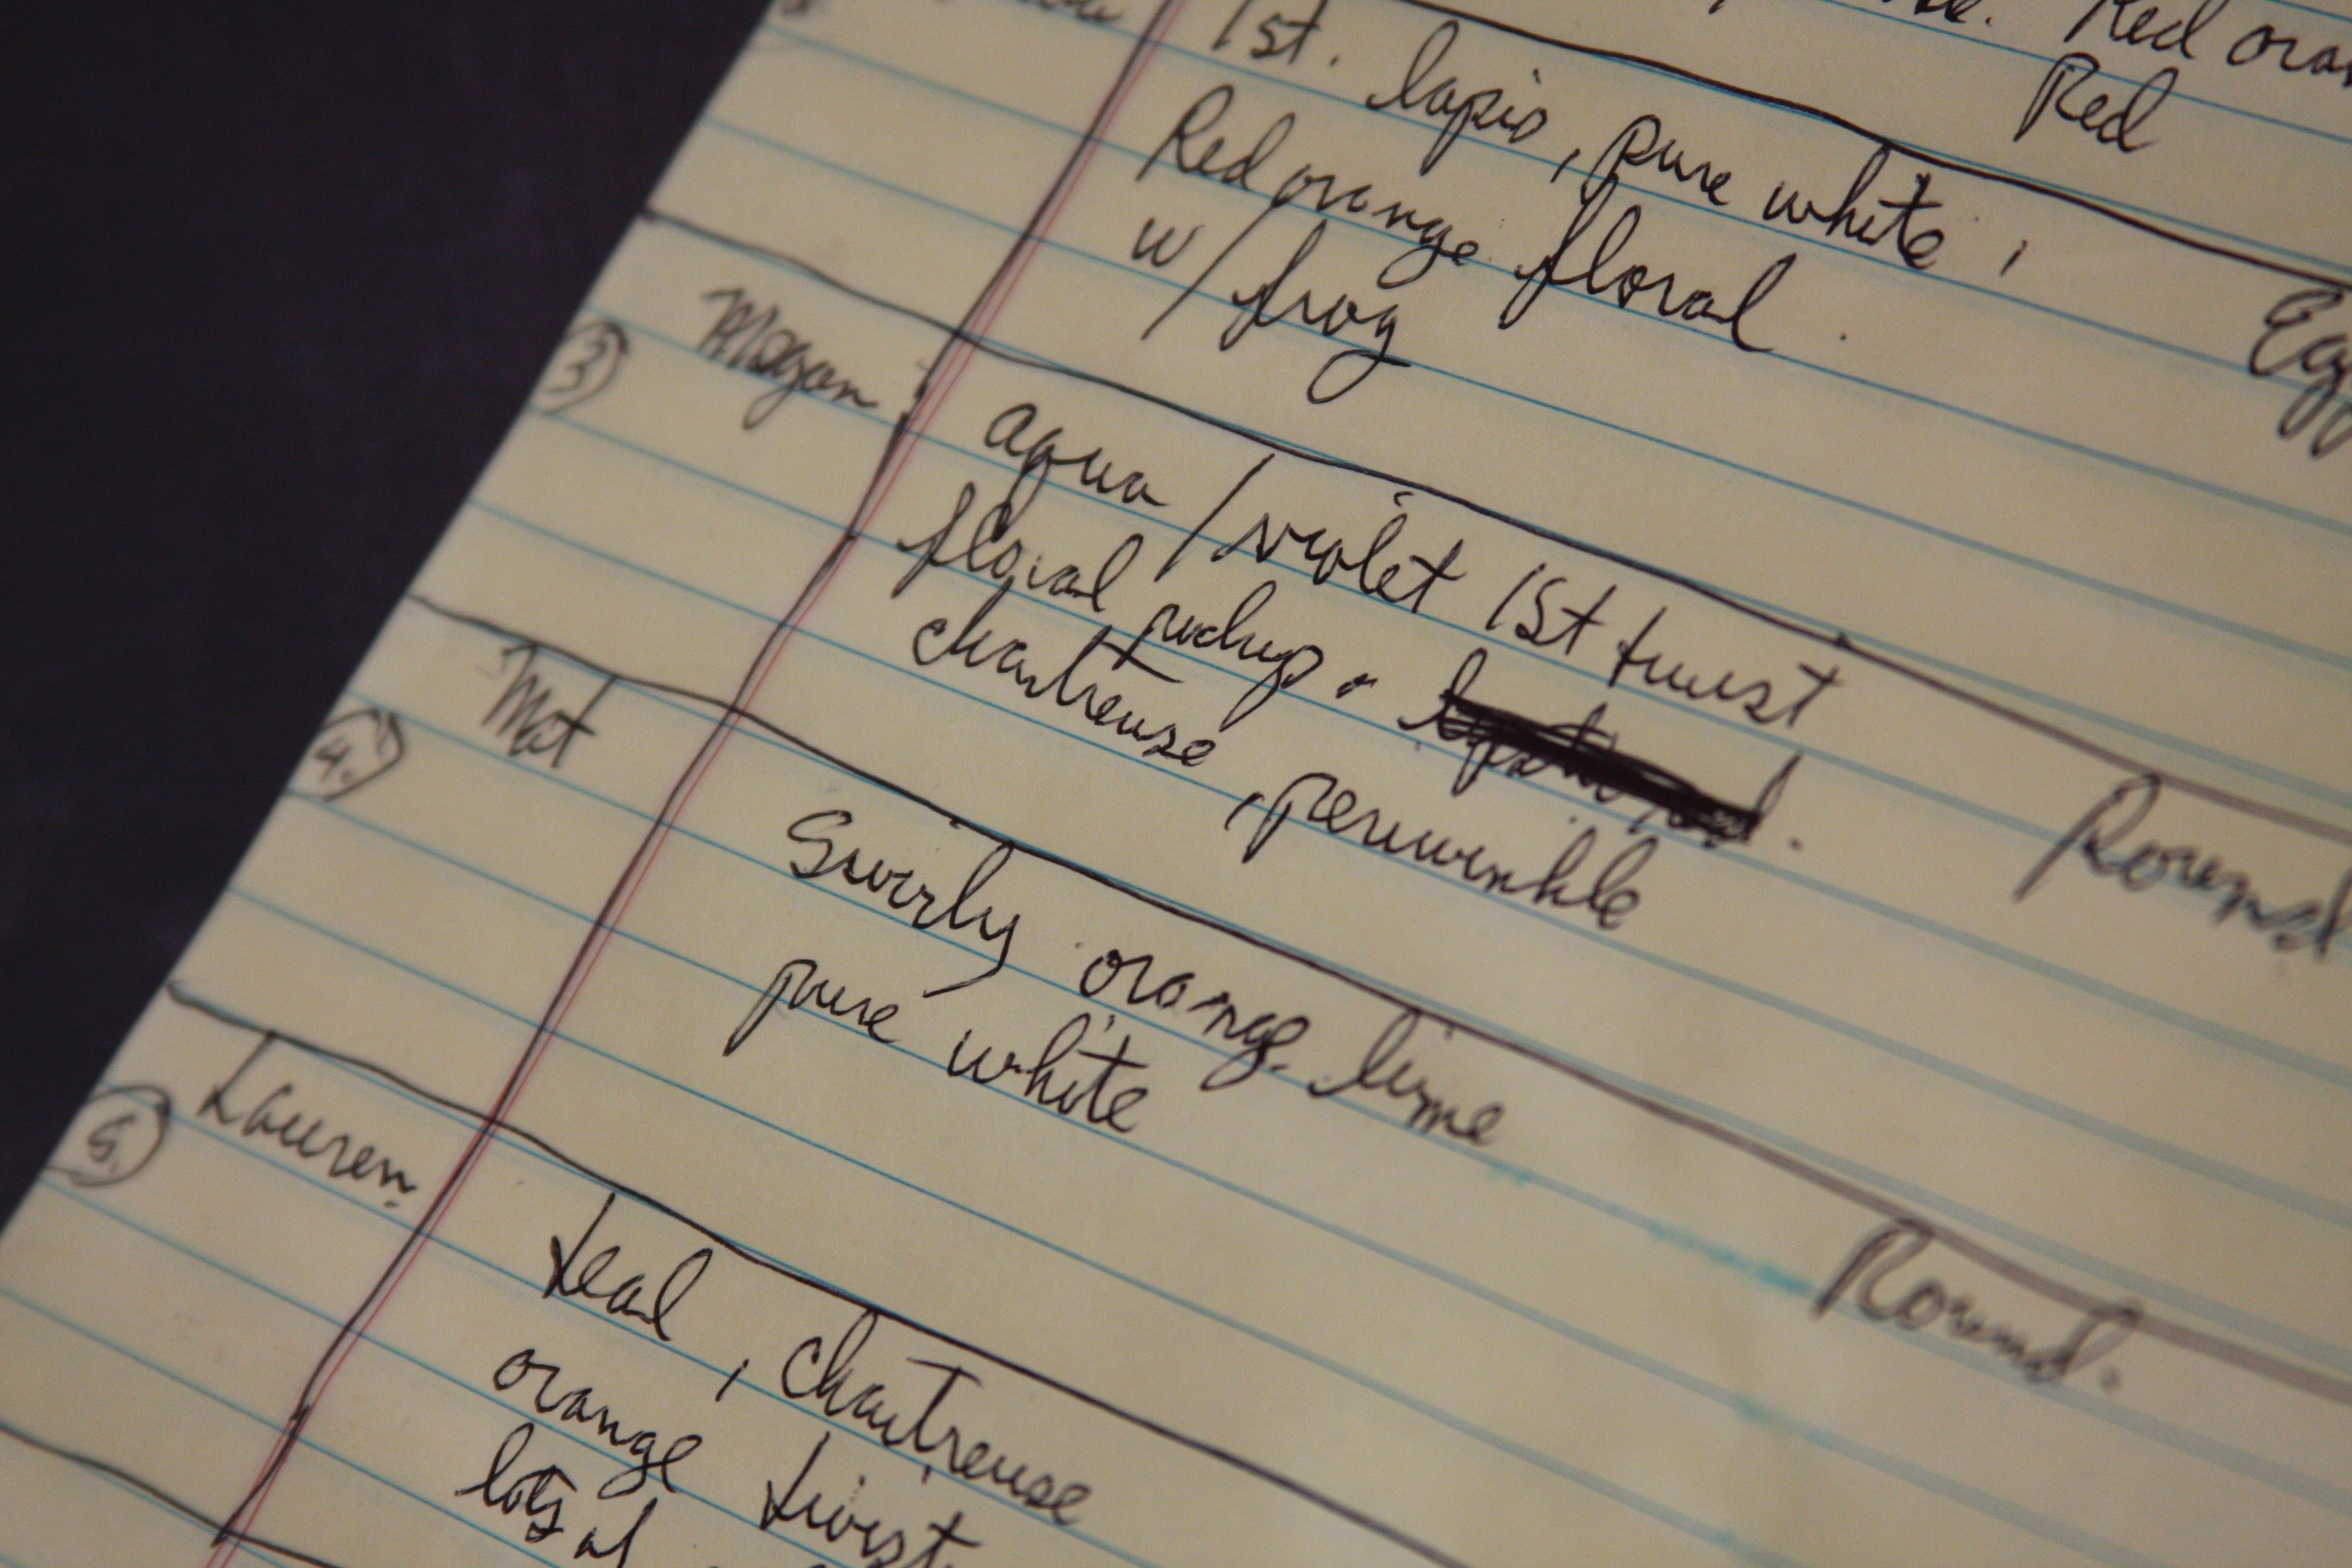
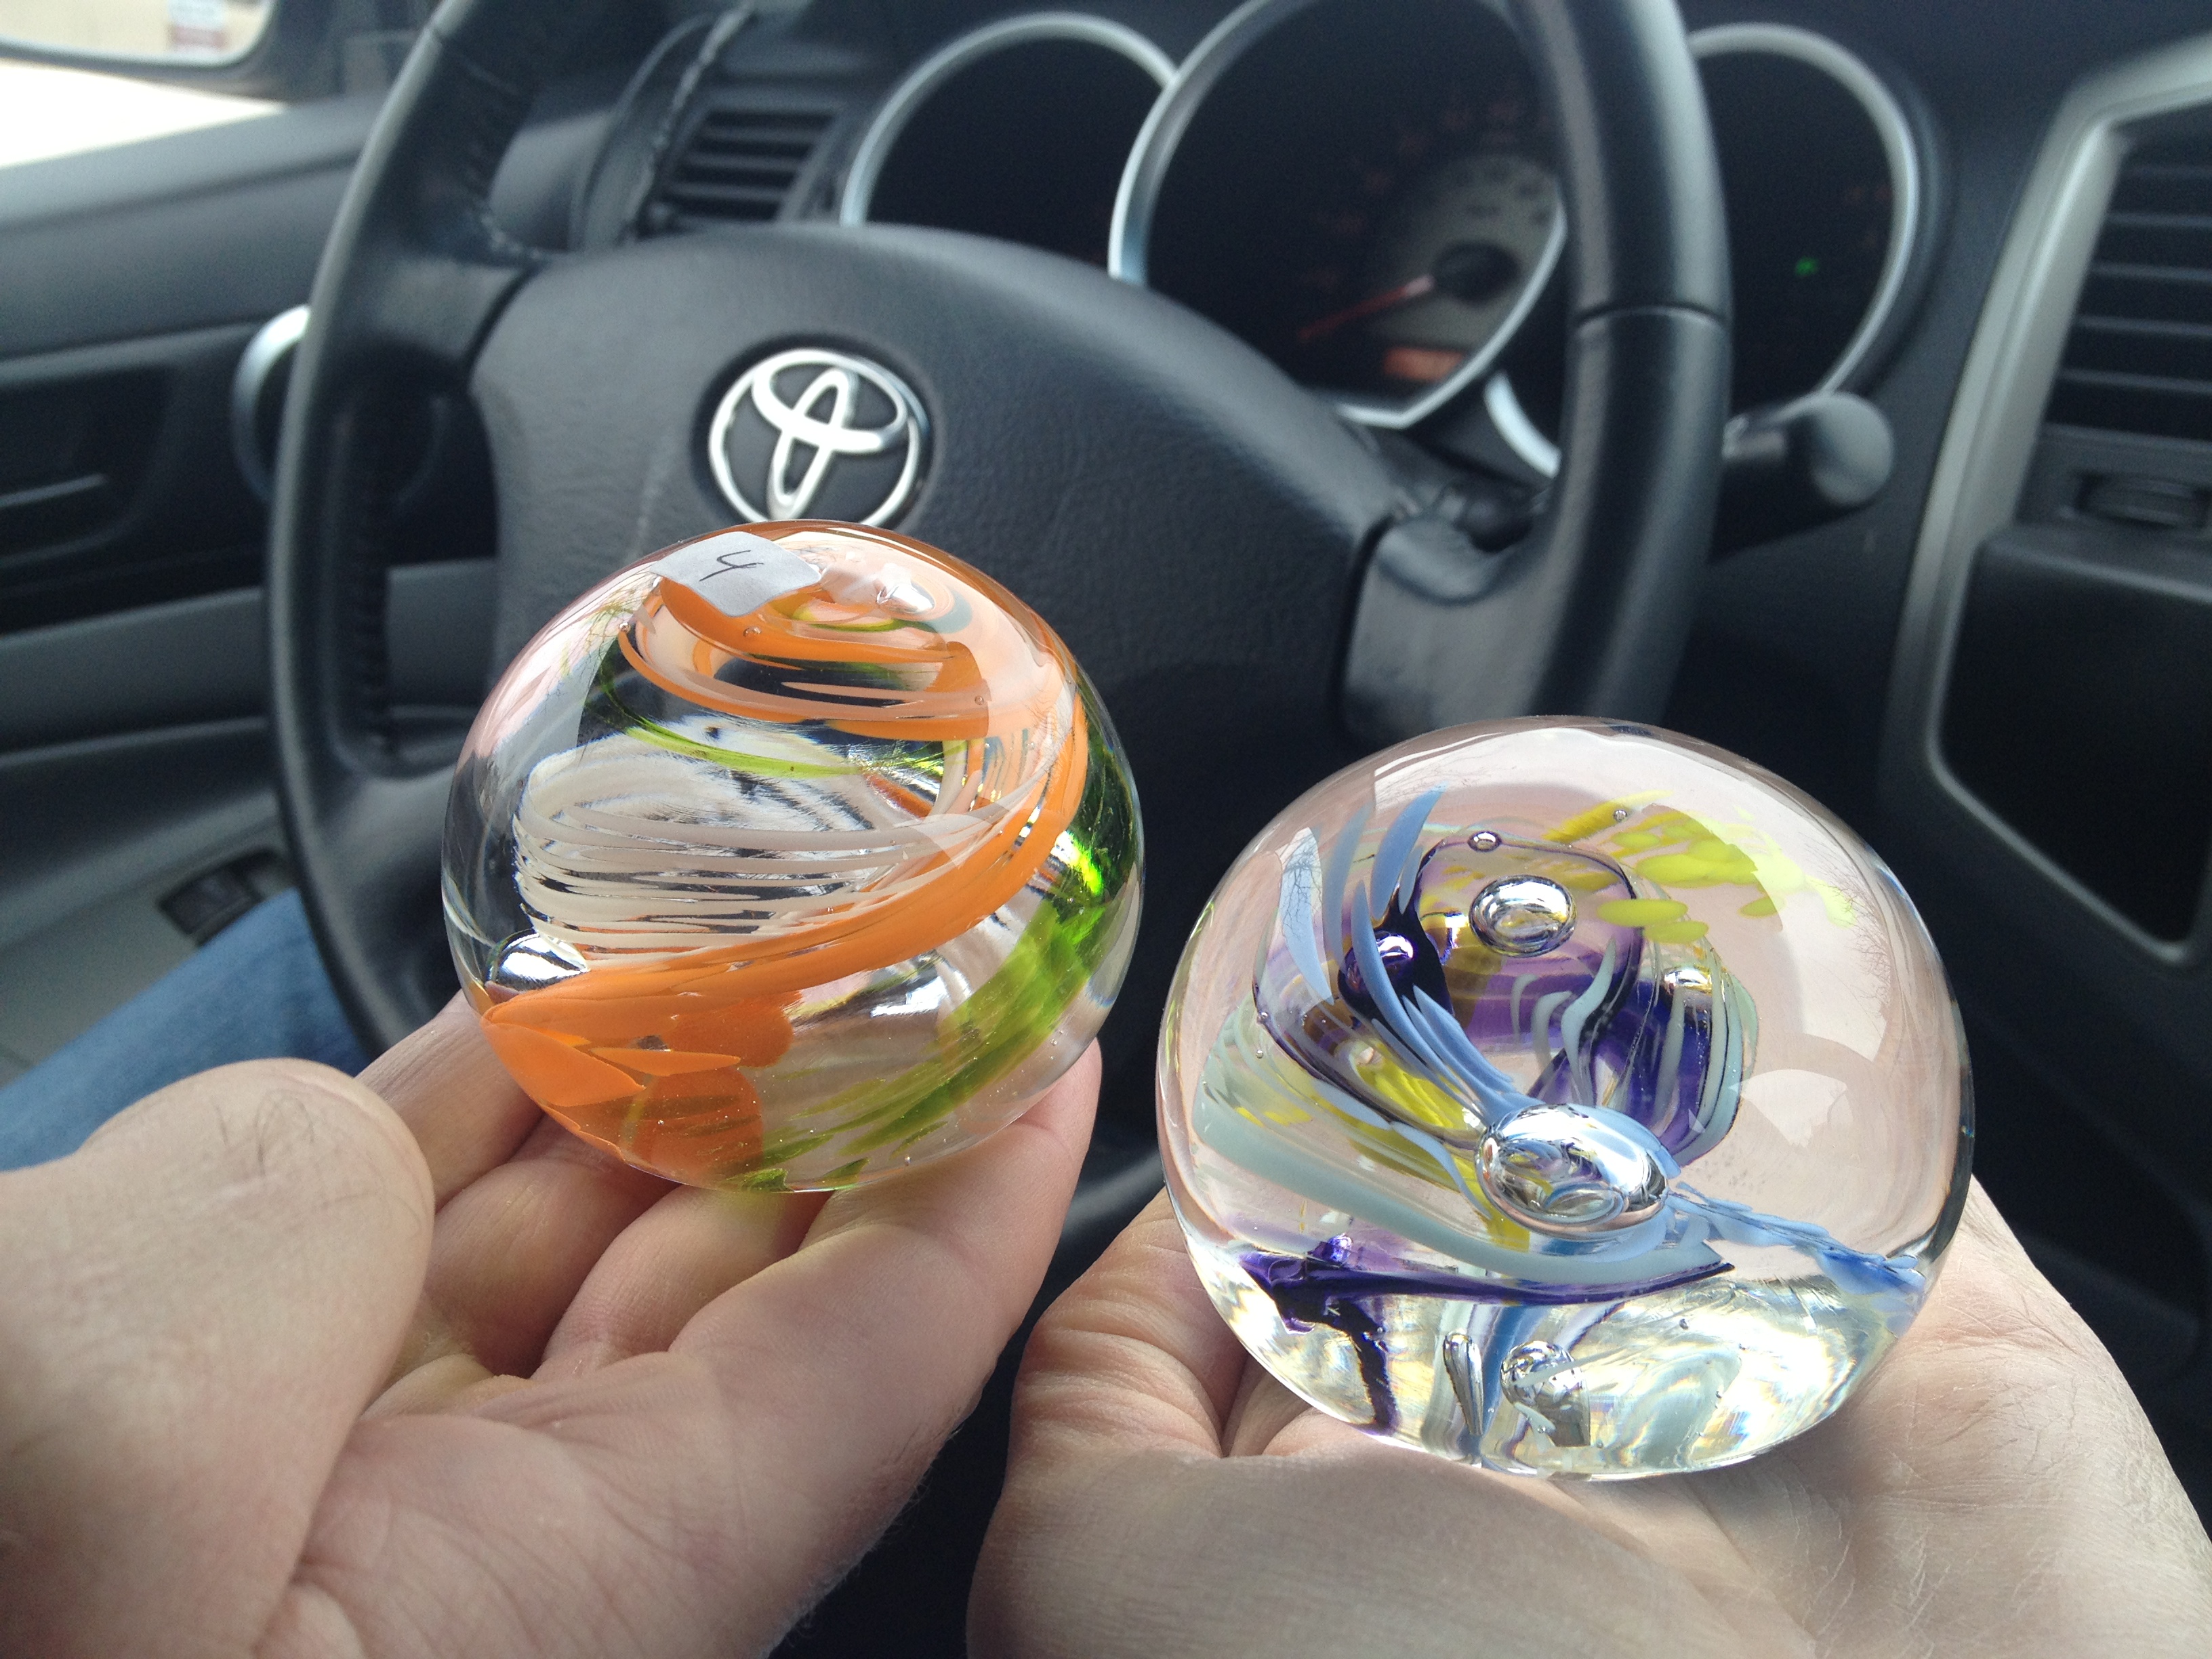
I selected this beautimus spectrum of colors:
(Violet, periwinkle, robins egg blue & chartreuse-but the chartreuse looks more yellowy in the paperweight)
My hubby decided to go for the tri colors. The tri colors of the Irish flag naturally. We are the Dugan McMurray married clan after all. I was impressed with his idea. Crafty. One of the million reasons I love him. Oh, and his last name is Dugan. My friends will tell you I had grown so picky as a single woman dating I actually had Irish, with a Gaelic surname on my dating deal breaker list. True story.

I went first. Gulp.

Flammables. Hair back, polyester fleece removed- I was ready to roll.
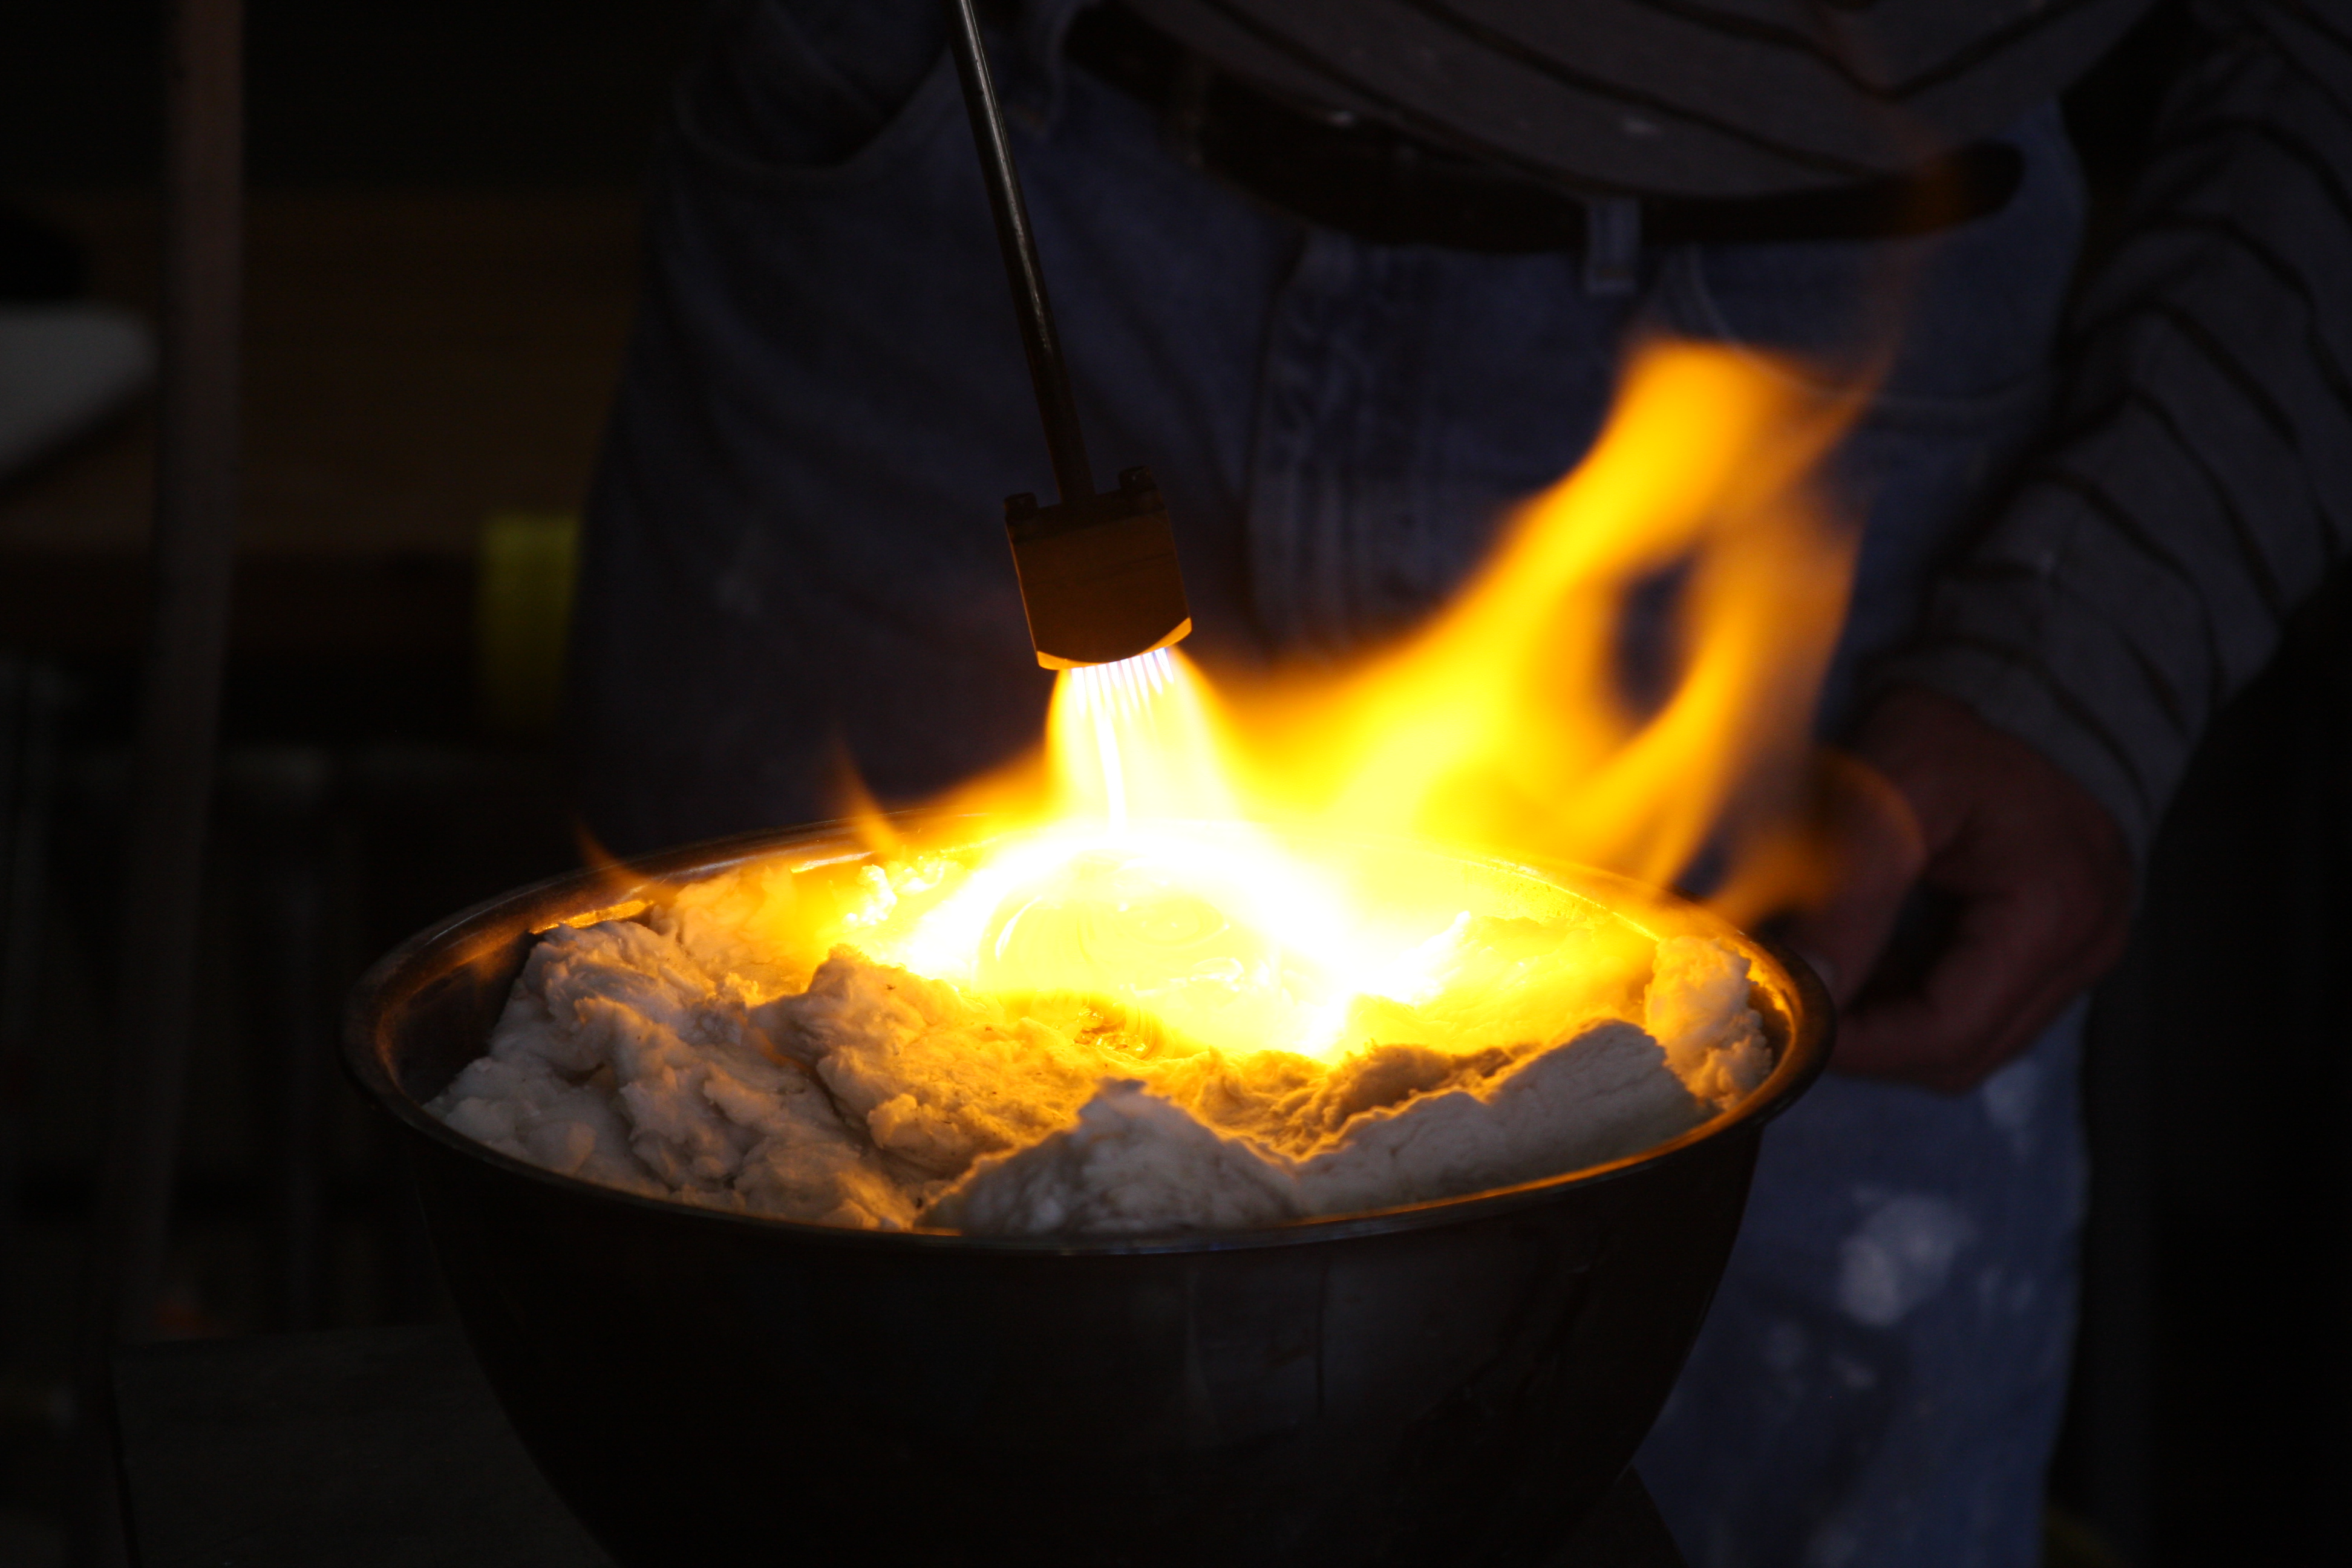
Al had the liquid glass, for lack of a better term, already heated. He dipped the long metal rod into the liquid glass and rolled the molten liquid glass around the rod.
Then, he handed it to me. I then dipped the rod into two of the colors. Then he added more liquid glass to it through a series of steps and gave the rod back to me to dip into my next two colors.

Then it was heated back up. (I am sure I am not getting all these steps right. I really just want you to get a good overall premise of how hands on you get to be, and the creative process…I’ll leave it to the professionals all the other aspects.)
Once heated, using needle nosed pliers I pinched the tip of the molten glass (while the rod is horizontal) and twisted the end of the material. This is what creates the lovely swirl.

Next, I dipped a wooden mold (round for me, this is where the ovoid etc. shape is produced) in water and helped shape the paperweight. Then I used ginormous tweezers to help create an area to break the paperweight off the rod.

Special reheating was required to tweak the perfect round shape.
Then I broke off the paperweight by tapping the rod, and it fell into a metal bowl filled insulation of sorts.
Then we heated it and stamped the base with a piece of metal to make it flat so it would sit nicely on my desk.
Next step, I helped place it in a kiln to cool it to room temperature. (For those that have worked in clay etc, this kiln reduces in temperature rather than escalating.) This process takes 24 hours plus, so Elodie and her crew can ship it to you, or you can pick it up. Interesting fact, the true colors only appear once cooled so you won’t know what your masterpiece looks like for days. The suspense.
We picked ours up. We were such dorks, throughout my birthday weekend our discussions went as follows:
“Do you think I got too much green in mine?…Did I get enough orange?…I can’t wait to see them when we get them Monday…Do you think I made it too swirly? I think at auction mine could bring upwards of $300.” Yep, my husband truly believes the sale of his may yield the beginnings of college tuition for a future child. : ) Mostly though, our conversations went…”holy $*&^ that was sooo much fun….lets go back and do the other class”…..In the end, they looked amazing when we picked them up. We couldn’t be happier, and they look stellar on our desks.
Want to book a class? Contact Elodie Holmes Liquid Light Glass at 505.820.2222 or sales@liquidlightglass.com
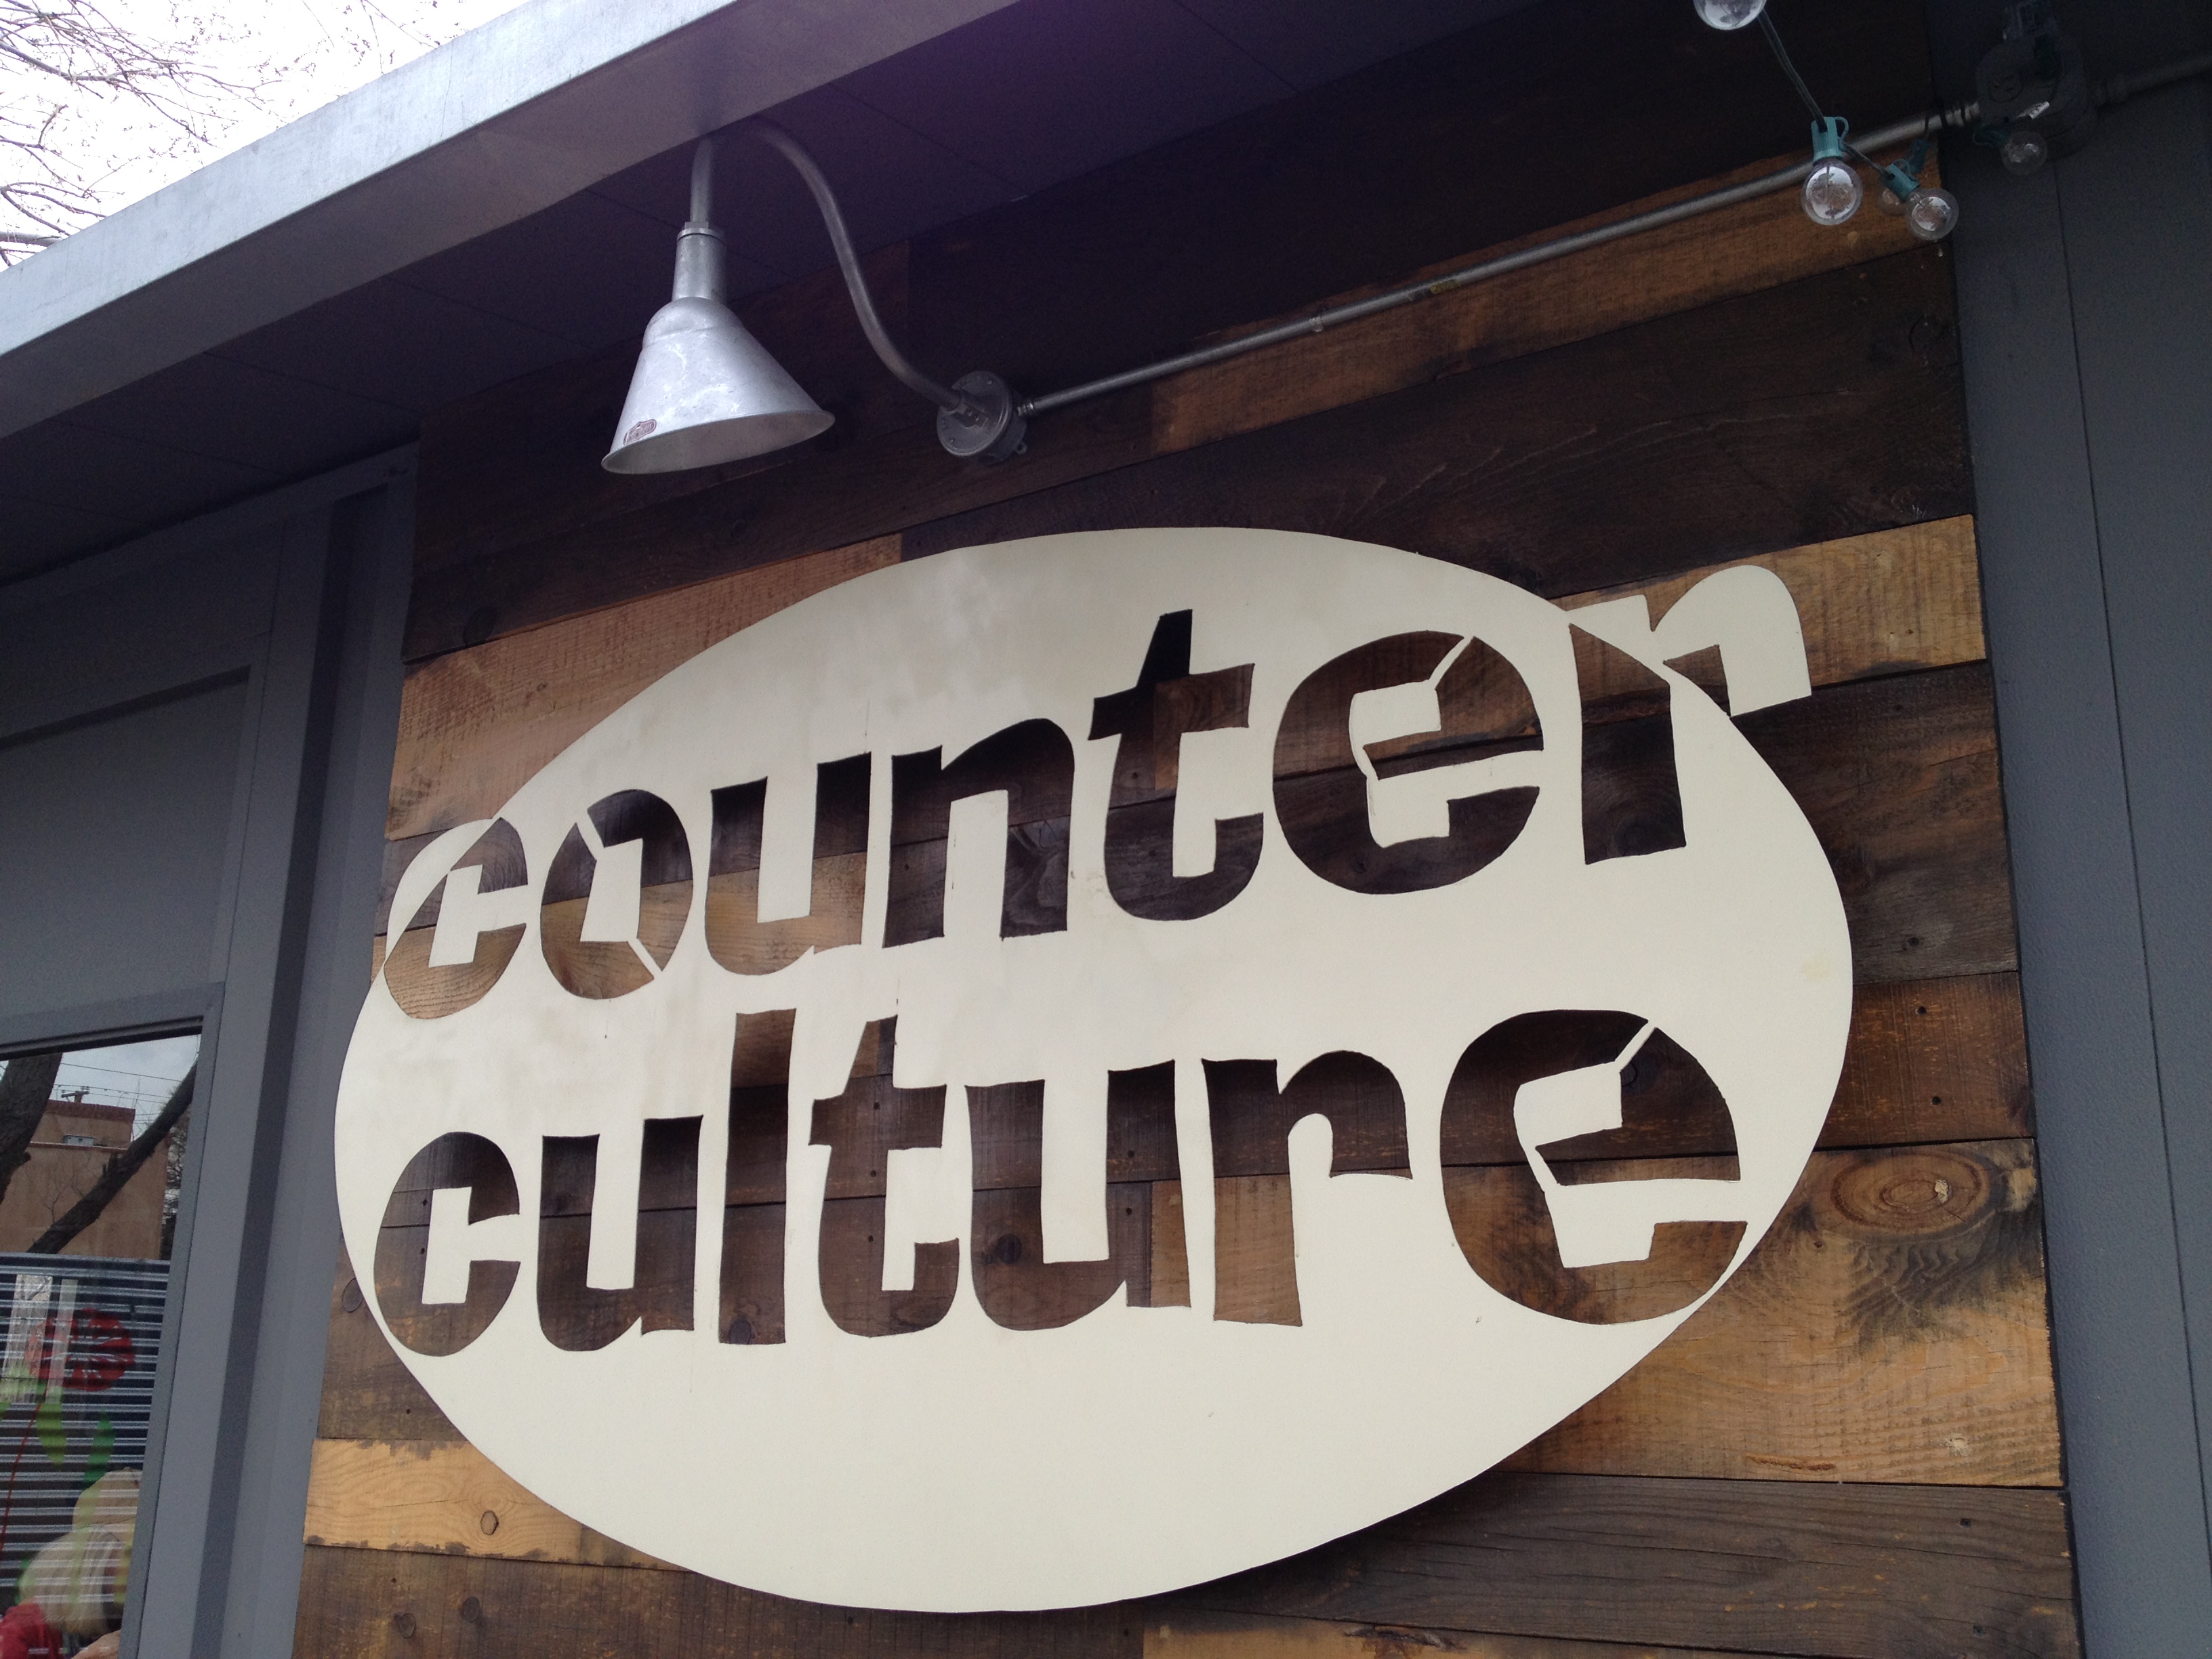
P.S. In the same complex as Elodie’s you’ll see the restaurant Counter Culture. One word. GO! We went twice, but we’re overachievers. Wait, I mean overeaters : ) More to come on my restaurant review…


")